首页 > 代码库 > Apache CXF 整合Spring
Apache CXF 整合Spring
一、创建一个 Java Web 工程,目录最终的结构如下图,下面我们将遂一说明:

二、把我们要用到的jar包全部放到lib目录下。
三、修改web.xml文件,整合CXF。
<?xml version="1.0" encoding="UTF-8"?>
<web-app id="WebApp_ID" version="2.4" xmlns="http://java.sun.com/xml/ns/j2ee" xmlns:xsi="http://www.w3.org/2001/XMLSchema-instance" xsi:schemaLocation="http://java.sun.com/xml/ns/j2ee http://java.sun.com/xml/ns/j2ee/web-app_2_4.xsd">
	<display-name>HelloSpringCXF</display-name>
    <servlet>
        <description>HelloSpringCXF</description>
        <display-name>cxf</display-name>
        <servlet-name>cxf</servlet-name>
        <servlet-class>org.apache.cxf.transport.servlet.CXFServlet</servlet-class>
        <load-on-startup>1</load-on-startup>
    </servlet>
    <servlet-mapping>
        <servlet-name>cxf</servlet-name>
        <url-pattern>/services/*</url-pattern>
    </servlet-mapping>
    <session-config>
        <session-timeout>60</session-timeout>
    </session-config>
</web-app>
四、创建服务器端代码:
4.1 接口HelloWorld 会用到一个@WebService注释,说明是WebService接口:
package com.yao.spring.service;

import java.util.List;

import javax.jws.WebService;

@WebService
public interface HelloWorld {
	String sayHi(String text);

	List<String> getListString();
}
package com.yao.spring.service;

import java.util.ArrayList;
import java.util.List;

import javax.jws.WebService;

@WebService(endpointInterface = "com.yao.spring.service.HelloWorld")
public class HelloWorldImpl implements HelloWorld {

    public String sayHi(String text) {
        System.out.println("sayHi called");
        return "Hello " + text;
    }

	@Override
	public List<String> getListString() {
		List<String> lists = new ArrayList<String>();
		lists.add("AA");
		lists.add("BB");
		lists.add("CC");
		return lists;
	}


}
3.3 在 WEB-INF 下 创建 cxf-servlet.xml 文件,整合Spring:

4.4 cxf-servlet.xml 文件的内容如下,jaxws:endpoint 填写要实现的类,address为地址这个要对应下面提到的4.6 里面 spring配置文件client-beans.xml的address地址,要填相对路径:
<?xml version="1.0" encoding="UTF-8"?>
<beans xmlns="http://www.springframework.org/schema/beans" xmlns:xsi="http://www.w3.org/2001/XMLSchema-instance" xmlns:jaxws="http://cxf.apache.org/jaxws" xsi:schemaLocation=" http://www.springframework.org/schema/beans http://www.springframework.org/schema/beans/spring-beans.xsd http://cxf.apache.org/jaxws http://cxf.apache.org/schemas/jaxws.xsd">
    <jaxws:endpoint id="helloWorld" implementor="com.yao.spring.service.HelloWorldImpl" address="/HelloWorld"/>
</beans>
4.5 在根文件夹下创建client-beans.xml 文件,这个为spring的配置文件。本例中创建了一个源文件夹config,并把client-beans.xml 放进去:

4.6 client-beans.xml 文件如下,<property name="address" value=http://www.mamicode.com/"http://localhost:8080/HelloSpringCXF/services/HelloWorld"/>这个为设置部署到Tomcat后WebService的访问地址,最后的/HelloWorld 就是对应 4.4 cxf-servlet.xml 里jaxws:endpoint的address,这个client bean 就可以调用服务器里的HelloWorld接口了:
<?xml version="1.0" encoding="UTF-8"?>
<beans xmlns="http://www.springframework.org/schema/beans" xmlns:xsi="http://www.w3.org/2001/XMLSchema-instance" xmlns:jaxws="http://cxf.apache.org/jaxws" xsi:schemaLocation=" http://www.springframework.org/schema/beans http://www.springframework.org/schema/beans/spring-beans.xsd http://cxf.apache.org/jaxws http://cxf.apache.org/schema/jaxws.xsd">
    <bean id="client" class="com.yao.spring.service.HelloWorld" factory-bean="clientFactory" factory-method="create"/>
    <bean id="clientFactory" class="org.apache.cxf.jaxws.JaxWsProxyFactoryBean">
        <property name="serviceClass" value=http://www.mamicode.com/"com.yao.spring.service.HelloWorld"/>>


  五、创建客户端,该类的实现比较简单,就是得到spring里的bean client并调用其方法:


package com.yao.spring.client;

import java.util.List;

import org.springframework.context.support.ClassPathXmlApplicationContext;

import com.yao.spring.service.HelloWorld;


public final class Client {

	private Client() {
	}

	public static void main(String args[]) throws Exception {
		ClassPathXmlApplicationContext context = new ClassPathXmlApplicationContext(new String[] { "client-beans.xml" });

		HelloWorld client = (HelloWorld) context.getBean("client");

		String response = client.sayHi("Joe");
		System.out.println("Response: " + response);

		List<String> lists = client.getListString();
		if (lists != null && lists.size() > 0) {
			for (String list : lists) {
				System.out.println(list);
			}
		}

		context.close();
		System.exit(0);
	}
}


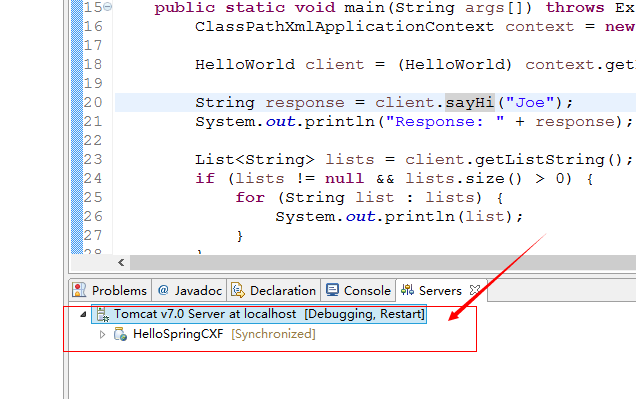
  六、部署到Tomcat:


 七、运行Client 类并打印:

2014-8-20 17:32:09 org.springframework.context.support.AbstractApplicationContext prepareRefresh
信息: Refreshing org.springframework.context.support.ClassPathXmlApplicationContext@735cda3f: startup date [Wed Aug 20 17:32:09 CST 2014]; root of context hierarchy
2014-8-20 17:32:09 org.springframework.beans.factory.xml.XmlBeanDefinitionReader loadBeanDefinitions
信息: Loading XML bean definitions from class path resource [client-beans.xml]
2014-8-20 17:32:09 org.springframework.beans.factory.support.DefaultListableBeanFactory preInstantiateSingletons
信息: Pre-instantiating singletons in org.springframework.beans.factory.support.DefaultListableBeanFactory@5d6d2633: defining beans [client,clientFactory]; root of factory hierarchy
2014-8-20 17:32:09 org.apache.cxf.wsdl.service.factory.ReflectionServiceFactoryBean buildServiceFromClass
信息: Creating Service {http://service.spring.yao.com/}HelloWorldService from class com.yao.spring.service.HelloWorld
Response: Hello Joe
AA
BB
CC
2014-8-20 17:32:10 org.springframework.context.support.AbstractApplicationContext doClose
信息: Closing org.springframework.context.support.ClassPathXmlApplicationContext@735cda3f: startup date [Wed Aug 20 17:32:09 CST 2014]; root of context hierarchy
2014-8-20 17:32:10 org.springframework.beans.factory.support.DefaultSingletonBeanRegistry destroySingletons
信息: Destroying singletons in org.springframework.beans.factory.support.DefaultListableBeanFactory@5d6d2633: defining beans [client,clientFactory]; root of factory hierarchy
