首页 > 代码库 > Web 前端基础 - CSS
Web 前端基础 - CSS
上一篇简单的过了一遍HTML的常用标签,这一篇继续CSS。
例1 CSS的标签选择器
<!DOCTYPE html>
<html lang="en">
<head>
    <meta charset="UTF-8">
    <title></title>
    <!--<link rel="stylesheet" href="http://www.mamicode.com/common.css" />-->
    <style>
        /*标签选择器,找到所有的标签应用以下样式*/
        div{
            color: green;
        }
        /*id选择器,找到标签id等于i1的标签,应用以下样式*/
        #i1{
            font-size: 56px;
            /* color: green; */
        }
        /*class选择器,找到class=c1的所有标签,应用一下样式*/
        .c1{
            background-color: red;
        }
        /*层级选择器,找到 class=c2 下的div下的p下的class=c3标签,应用以下样式*/
        /*.c2 div p a{*/
            /**/
        /*}*/
        .c2 div p .c3{
            background-color: red;
        }
        /*组合选择器,找到class=c4,class=c5,class=c6,的标签,应用以下样式*/
        .c4,.c5,.c6{
            background-color: aqua;
        }
    </style>
</head>
<body>
    <div class="c4">1</div>
    <div class="c5">1</div>
    <div class="c6">1</div>
    <div class="c2">
        <div></div>
        <div>
            <p>
                <span>oo</span>
                <a class="c3">uu</a>
            </p>
        </div>
    </div>
    <div class="c3">sdfsdf</div>
    <span class="c1">1</span>
    <div class="c1">2</div>
    <a class="c1">3</a>
    <a id="i1">baidu</a>
    <div>99</div>
    <div>99</div>
    <div>99</div>
    <div>
        <div>asdf</div>
    </div>
</body>
</html>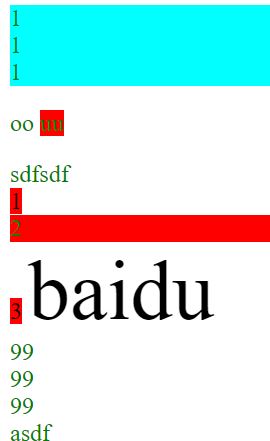
例2 加载CSS文件
创建一个css文件,把style内容写进去

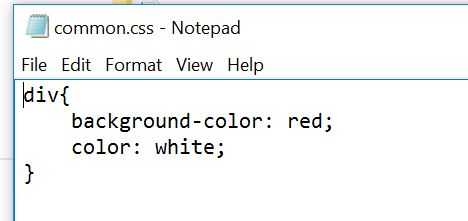
在html文件里面导入这个css文件,效果和直接写是一样的
<!DOCTYPE html>
<html lang="en">
<head>
    <meta charset="UTF-8">
    <title></title>
    <link rel="stylesheet" href="http://www.mamicode.com/common.css" />
</head>
<body>
    <div>asdfasdfsdf</div>
</body>
</html>

例3 float的使用
如果不用float,那么因为<div>是块级标签,他会自动变成两行,使用float之后,漂浮起来变成一行
<!DOCTYPE html>
<html lang="en">
<head>
    <meta charset="UTF-8">
    <title></title>
    <style>
        .c1{
            color: red;
            /*background-color: #FF69B4;*/
            /*background-color: rgb(25,180,10);*/
            /*background-color: red;*/
            font-size: 32px;
            height: 150px;
            width: 500px; /* 按照父亲相对占比*/
        }
    </style>
</head>
<body>
    <div class="c1">test1</div>
    <div style="width: 500px;">
        <div style="width: 20%;background-color: antiquewhite;float: left">test2</div>
        <div style="width: 80%;background-color: palegoldenrod;float: left">test3</div>
    </div>
</body>
</html>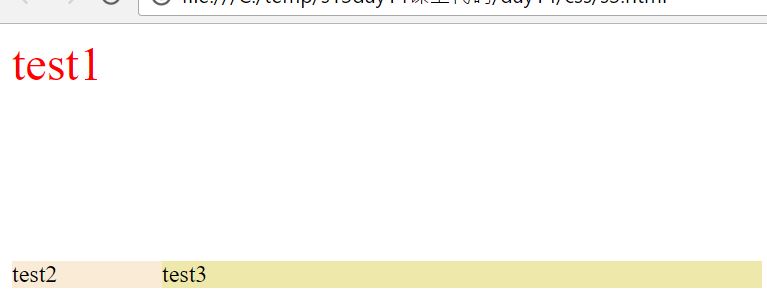
例4. 加载背景图片
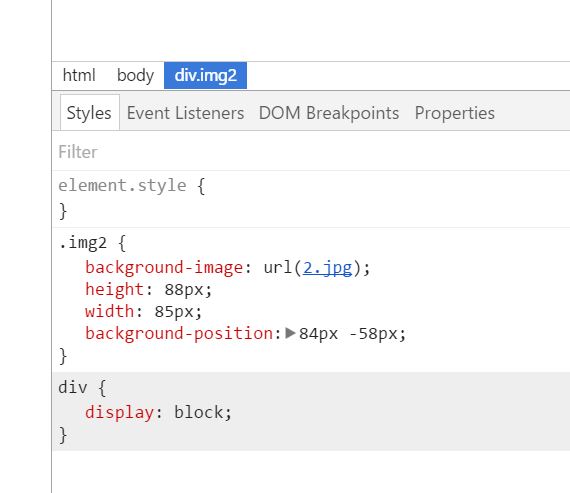
使用背景图片的时候需要指定高度,宽带;一个使用技巧是通过Chrome的F12,可以滚轮编辑数字像素
<!DOCTYPE html>
<html lang="en">
<head>
    <meta charset="UTF-8">
    <title></title>
    <style>
        .img{
            background-image: url("4.gif");
            height: 200px;
            width: 400px;
            background-repeat: no-repeat;
        }
        .img2{
            background-image: url("2.jpg");
            height: 50px;
            width: 50px;
            background-position: 84px -58px;
        }
    </style>
</head>
<body>
    <div class="img"></div>
    <div class="img2"></div>
</body>
</html>
列5 边距
<!DOCTYPE html>
<html lang="en">
<head>
    <meta charset="UTF-8">
    <title></title>
</head>
<body>
    <div style="height: 70px;border: 1px solid blue;">
        <div style="height: 30px;background-color: green;"></div>
    </div>
    <div style="height: 100px;background-color: #ddd;border: 1px solid red;">
        <div style="margin-top: 30px;margin-left: 100px;">
            <input />
            <input />
            <input />
        </div>
    </div>
</body>
</html>
注意那三个input距离上边和左边的距离

列6 clear的使用
clear可以禁止float, 默认一个float的标签后面跟着的标签会跟着float起来,可以指定clear来控制是否漂浮
<!DOCTYPE html>
<html lang="en">
<head>
    <meta charset="UTF-8">
    <title></title>
</head>
<body>
    <div style="width: 500px;border: 1px solid red;">
        <div style="width: 20%;background-color: aqua;float: left">f</div>
        <div style="width: 30%;background-color: beige;float: right">a</div>
        <div style="width: 30%;background-color: beige;float: right">a</div>
        <div style="clear: both;"></div>
    </div>
</body>
</html>

不用clear的效果

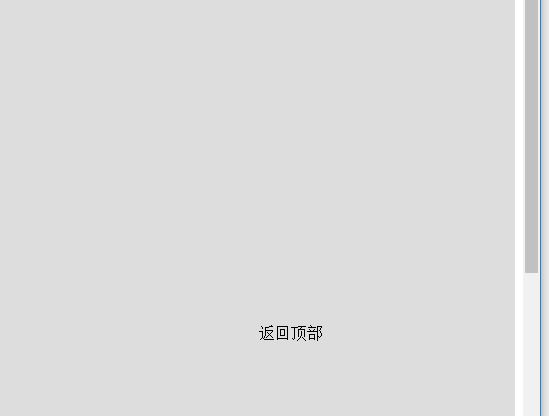
例7 position的使用 首先看fixed的使用,固定标签在某个位置
<!DOCTYPE html>
<html lang="en">
<head>
    <meta charset="UTF-8">
    <title></title>
</head>
<body>
    <div style="height: 1000px;background-color: #ddd;"></div>
    <div style="position: fixed;right:200px;bottom: 100px;">返回顶部</div>
</body>
</html>
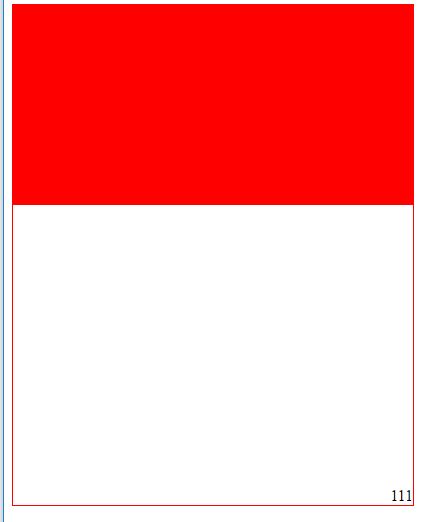
例8 position的使用场景2,外面使用relative,里面用absolute
<!DOCTYPE html>
<html lang="en">
<head>
    <meta charset="UTF-8">
    <title></title>
</head>
<body>
    <div style="height: 500px;width: 400px;border: 1px solid red;position: relative">
        <div style="height: 200px;background-color: red;">
            <div style="position: absolute;bottom: 0;right: 0;">111</div>
        </div>
    </div>
</body>
</html>
例9加载图片,和背景图使用类似,也需要指定高度和宽度
<!DOCTYPE html>
<html lang="en">
<head>
    <meta charset="UTF-8">
    <title></title>
</head>
<body>
    <img src="http://www.mamicode.com/2.jpg" style="height: 500px;width: 200px;">
</body>
</html>
例10 一个模拟对话框的界面
display:none 隐藏标签
如果希望实现弹出框一个居中的效果,可以指定top: 50%,left:50%,这样左上角就居中了,然后根据弹出框的尺寸,左移动一半,下移动一半
如有多层,可以指定z-index来觉得谁在谁上面
<!DOCTYPE html>
<html lang="en">
<head>
    <meta charset="UTF-8">
    <title></title>
    <style>
        .hide {
            display: none;
        }
        .modal{
            width: 400px;
            height: 300px;
            background-color: #dddddd;
            position: fixed;
            top: 50%;
            left: 50%;
            margin-left: -200px;
            margin-top: -150px;
            z-index: 10;
        }
        .shadow{
            position: fixed;
            top: 0;
            left: 0;
            right: 0;
            bottom: 0;
            /*background-color: black;*/
            /*opacity: 0.4;*/
            background-color: rgba(0,0,0,.6);
             z-index: 9;
        }
    </style>
</head>
<body>
    <input type="button" value="http://www.mamicode.com/添加" />
    <div class="shadow"></div>
    <div class="modal">
        <input type="text"/>
        <input type="text"/>
        <input type="text"/>
        <input type="text"/>
    </div>
    <div style="height: 2000px;">
    </div>
</body>
</html>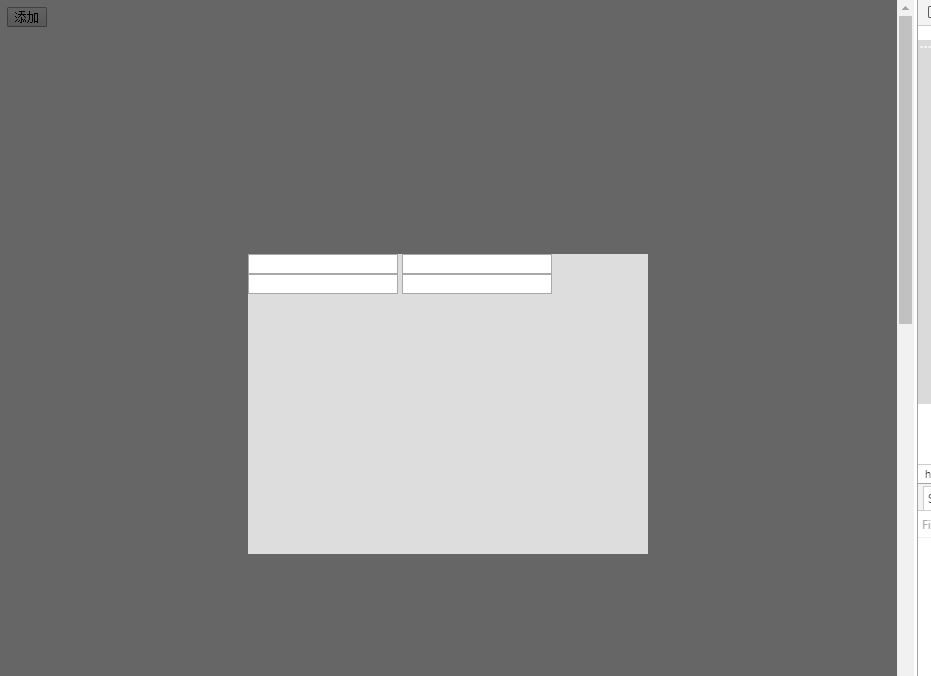
例11. 菜单高亮效果
布局一般分为三大块:header,body和foot
根据需求可以left float或者right float
cursor是鼠标放上去的效果
.w里面 margin:0 auto可以保证在拖曳浏览器大小的时候,整个页面始终居中显示
<!DOCTYPE html>
<html lang="en">
<head>
    <meta charset="UTF-8">
    <title></title>
    <style>
        body{
            margin: 0;
        }
        ul{
            margin: 0;
            list-style-type: none;
        }
        ul li{
            float: left;
            padding: 0 8px 0 8px;
            color: white;
            cursor: pointer;
        }
        /*当鼠标移动到li标签上时,自动应用以下样式*/
        ul li:hover{
            background-color: blueviolet;
        }
        .pg-header{
            height: 44px;
            background-color: #2459a2;
            line-height: 44px;
        }
        .w{
            width: 980px;
            margin: 0 auto;
            background-color: red;
        }
    </style>
</head>
<body>
    <div class="pg-header">
        <div class="w">
            <ul>
                <li>菜单一</li>
                <li>菜单二</li>
                <li>菜单三</li>
                <li>菜单三</li>
                <li>菜单三</li>
                <li>菜单三</li>
                <li>菜单三</li>
                <li>菜单三</li>
            </ul>
        </div>
    </div>
    <div class="pg-body"></div>
    <div class="pg-footer"></div>
</body>
</html>
本文出自 “麻婆豆腐” 博客,请务必保留此出处http://beanxyz.blog.51cto.com/5570417/1892249
Web 前端基础 - CSS
