首页 > 代码库 > FastDFS 应用测试
FastDFS 应用测试
配置nginx为storage server提供http访问接口:
==============================================================================
背景:
在大多数业务场景中,往往需要为FastDFS存储的文件提供http下载服务,而尽管FastDFS在其storage及tracker都内置了http服务, 但性能表现却不尽如人意;
作者余庆在后来的版本中增加了基于当前主流web服务器的扩展模块(包括nginx/apache),其用意在于利用web服务器直接对本机storage数据文件提供http服务,以提高文件下载的性能。
描述:
nginx 配置在storage节点上(本例以storage节点的node2为例);
因为 nginx 要想连接 fastdfs 就必须要有相应的模块,所以要编译安装 nginx 把fastdfs-nginx-module 模块编译进去
步骤如下:
1.首先下载 fastdfs-nginx-module 和 编译安装nginx 的源码包
# 从官方站点上克隆 fastdfs-nginx-module 模块
[root@centos7 ~]# git clone https://github.com/happyfish100/fastdfs-nginx-module.git
Cloning into ‘fastdfs-nginx-module‘...
remote: Counting objects: 57, done.
remote: Total 57 (delta 0), reused 0 (delta 0), pack-reused 57
Unpacking objects: 100% (57/57), done.

# 准备好的nginx源码包如下
[root@centos7 fastdfs]# ls
fastdfs-nginx-module  nginx-1.10.0.tar.gz

[root@centos7 fastdfs]# tar xf nginx-1.10.0.tar.gz
[root@centos7 fastdfs]# ls
fastdfs-nginx-module  nginx-1.10.0  nginx-1.10.0.tar.gz
2.准备编译安装的环境
yum groupinstall "Development Tools" "Server Platfrom Development" -y
yum install pcre-devel openssl-devel zlib-devel -y
3.创建 nginx 用户编译安装nginx,指明 fastdfs-nginx-module 模块的位置
[root@centos7 nginx-1.10.0]# useradd -r nginx
[root@centos7 nginx-1.10.0]# ls
auto  CHANGES  CHANGES.ru  conf  configure  contrib  html  LICENSE  Makefile  man  objs  README  src

[root@centos7 nginx-1.10.0]# ./configure --prefix=/usr/local/nginx --conf-path=/etc/nginx/nginx.conf
--error-log-path=/var/log/nginx/error.log --http-log-path=/var/log/nginx/access.log
--pid-path=/var/run/nginx/nginx.pid --lock-path=/var/lock/nginx.lock --user=nginx --group=nginx
--with-http_ssl_module --with-http_stub_status_module --with-pcre --add-module=/root/fastdfs/fastdfs-nginx-module/src

[root@centos7 nginx-1.10.0]# make && make install
3、复制配置文件
# cp fastdfs-nginx/module/src/mod_fastdfs.conf  /etc/fdfs/
# cp fastdfs-5.0.8/conf/{httpd.conf,mime.types}  /etc/fdfs/
   注意:fastdfs-5.0.8为fastdfs源码目录;
4、配置/etc/fdfs/mod_fastdfs.conf配置文件,部分指令类似如下所示;
  base_path=/data/fdfs/storage
  tracker_server=192.168.1.112:22122
  storage_server_port=23000
  group_name=group1
  url_have_group_name = true
  store_path_count=1
  store_path0=/data/fdfs/storage/0

  [group1]
  group_name=group1
  storage_server_port=23000
  store_path_count=1
  store_path0=/data/fdfs/storage/0
5、配置nginx,编辑nginx.conf,在server中添加类似如下内容:
  location ~ /group[0-9]+/M00/ {
      root /data/fdfs/storage/0/data/;
      ngx_fastdfs_module;
  }
6、为存储文件路径创建链接至M00,此示例中使用的storage_path0为/data/fdfs/storage/0;
# ln -sv /data/fdfs/storage/0  /data/fdfs/storage/0/M00

[root@centos7 ~]# ll /data/fdfs/storage/0/
total 12
drwxr-xr-x 258 root root 8192 Mar 24 11:50 data
lrwxrwxrwx   1 root root   20 Mar 24 11:23 M00 -> /data/fdfs/storage/0
7、启动nginx服务即可;
[root@centos7 sbin]# pwd
/usr/local/nginx/sbin

[root@centos7 sbin]# ./nginx -t
ngx_http_fastdfs_set pid=27041
nginx: the configuration file /etc/nginx/nginx.conf syntax is ok
nginx: configuration file /etc/nginx/nginx.conf test is successful

[root@centos7 sbin]# ./nginx

[root@centos7 sbin]# ps aux| grep ‘nginx‘
root      27011  0.0  0.1  52880  1160 ?        Ss   11:25   0:00 nginx: master process ./nginx
nginx     27012  0.0  0.2  55524  2516 ?        S    11:25   0:00 nginx: worker process
8、上传文件,测试:
# node3 节点上传文件
[root@centos7 fdfs]# fdfs_upload_file /etc/fdfs/client.conf /usr/share/wallpapers/Autumn/contents/images/1600x1200.jpg
group1/M00/00/00/wKgBcVjUlzqAEyeUAAxFCUUQ0Sc981.jpg

[root@centos7 fdfs]# fdfs_file_info /etc/fdfs/client.conf group1/M00/00/00/wKgBcVjUlzqAEyeUAAxFCUUQ0Sc981.jpg
source storage id: 0
source ip address: 192.168.1.113
file create timestamp: 2017-03-24 11:49:14
file size: 804105
file crc32: 1158730023 (0x4510D127)

[root@centos7 fdfs]# fdfs_upload_file /etc/fdfs/client.conf /usr/share/wallpapers/Hanami/contents/images/1920x1200.jpg
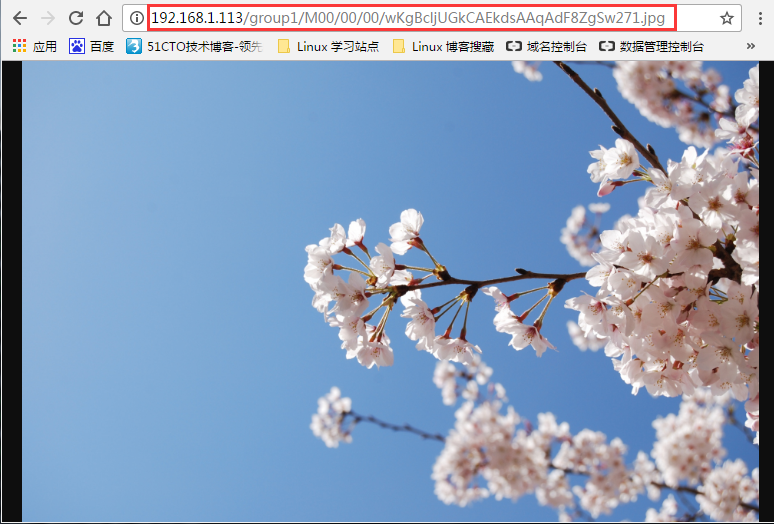
group1/M00/00/00/wKgBcljUGkCAEkdsAAqAdF8ZgSw271.jpg

[root@centos7 fdfs]# fdfs_file_info /etc/fdfs/client.conf group1/M00/00/00/wKgBcljUGkCAEkdsAAqAdF8ZgSw271.jpg
source storage id: 0
source ip address: 192.168.1.114
file create timestamp: 2017-03-24 02:56:00
file size: 688244
file crc32: 1595506988 (0x5F19812C)
9.在浏览器中访问路径的URL为fid:

本文出自 “逐梦小涛” 博客,请务必保留此出处http://1992tao.blog.51cto.com/11606804/1909976
FastDFS 应用测试
