首页 > 代码库 > 本地搭建yum源方法【二】
本地搭建yum源方法【二】
1. 搭建本地光盘YUM源
[root@yum ~]# mkdir /mnt/cdrom/ ------》创建光盘挂载目录
[root@yum ~]# mount /dev/cdrom /mnt/cdrom/ --------》挂在光盘
[root@yum ~]# cd /etc/yum.repos.d/ --------》切换到YUM配置目录
[root@yum yum.repos.d]# tar czf repo.tar.gz ./* --------》将原来所有的文件进行打包备份
[root@yum yum.repos.d]# rm -f CentOS* --------》删除原文件
[root@yum yum.repos.d]# vim CentOS-Media.repo --------》配置光盘源文件
[c6-media]
name=CentOS-$releasever - Media
baseurl=file:///mnt/cdrom --------》这里为你光盘的挂载目录
gpgcheck=1 --------》是否启动检查GPG-KEY
enabled=1 --------》是否启用YUM源
gpgkey=file:///mnt/cdrom/RPM-GPG-KEY-CentOS-6 --》指定挂载目录下的GPG-KEY文件
验证:

2. 如果要让公司所有的Linux主机可用内部源服务,可以用FTP/HTTP搭建一个YUM服务器,由于Http较为简便,我这里就以HTTP的方式搭建一个YUM服务了。
继上面的操作,我借用本地光盘源搭建一个HTTP的YUM服务!
2.1
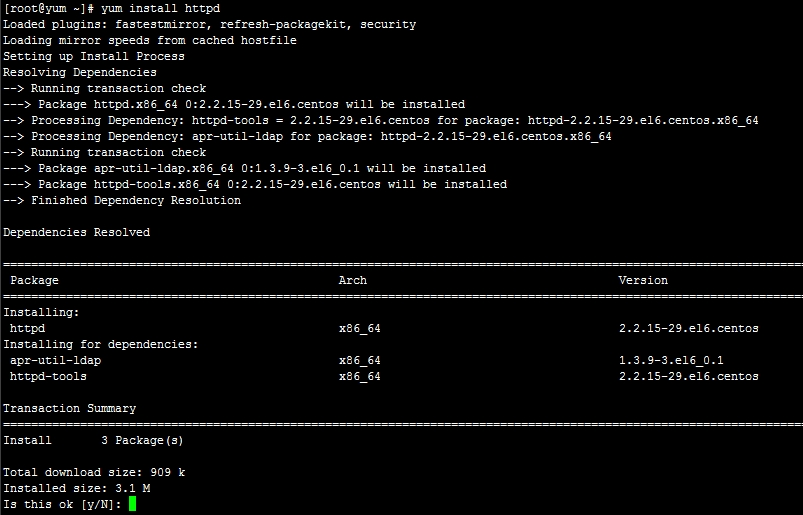
HTTP我在上面已经通过YUM的方式安装了,如果大家没有安装可以通过光盘里面的安装包进行安装,联网也可以通过网络的YUM进行安装。启动http服务!关闭防火墙和SELinux!
[root@yum ~]# service httpd start
Starting httpd: httpd: apr_sockaddr_info_get() failed for yum.server [ OK ]
[root@yum ~]# chkconfig httpd on
[root@yum ~]# service iptables stop
[root@yum ~]# chkconfig iptables off
[root@yum ~]# setenforce 0
2.2
在Apache根目录下建立子文件夹,如果想让本YUM服务器为不同版本的Linux服务,可根据情况创建目录,然后将光盘内所有的文件CP至该目录!
注:一般使用DVD1即可,当然也可以合并DVD1和DVD2来作为源。
[root@yum ~]# mkdir -p /var/www/html/yum
[root@yum ~]# mkdir -p /var/www/html/yum/CentOS-6
[root@yum ~]# cp -prf /mnt/cdrom/* /var/www/html/yum/CentOS-6/
2.3
客户端修改CentOS-Base.repo,建议先备份一个副本哦,这样以后要从外网更新的话,可以再用。
[root@test1 yum.repos.d]# cp CentOS-Base.repo CentOS-Base.repo.bak1
[root@test1 yum.repos.d]# vim CentOS-Base.repo
###################CentOS-Base.repo内容修改后,如下#####################
# CentOS-Base.repo # # The mirror system uses the connecting IP address of the client and the # update status of each mirror to pick mirrors that are updated to and # geographically close to the client. You should use this for CentOS updates # unless you are manually picking other mirrors. # # If the mirrorlist= does not work for you, as a fall back you can try the # remarked out baseurl= line instead. # #
[base] name=CentOS-$releasever - Base #mirrorlist=http://mirrorlist.centos.org/?release=$releasever&arch=$basearch&repo=os baseurl=http://172.20.1.11/yum/CentOS-6 enable=1 gpgcheck=1 gpgkey=file:///etc/pki/rpm-gpg/RPM-GPG-KEY-CentOS-6
#released updates [updates] name=CentOS-$releasever - Updates #mirrorlist=http://mirrorlist.centos.org/?release=$releasever&arch=$basearch&repo=updates baseurl=http://172.20.1.11/yum/CentOS-6 enable=1 gpgcheck=1 gpgkey=file:///etc/pki/rpm-gpg/RPM-GPG-KEY-CentOS-6 #additional packages that may be useful [extras] name=CentOS-$releasever - Extras #mirrorlist=http://mirrorlist.centos.org/?release=$releasever&arch=$basearch&repo=extras baseurl=http://172.20.1.11/yum/CentOS-6 enable=1 gpgcheck=1 gpgkey=file:///etc/pki/rpm-gpg/RPM-GPG-KEY-CentOS-6
#additional packages that extend functionality of existing packages [centosplus] name=CentOS-$releasever - Plus mirrorlist=http://mirrorlist.centos.org/?release=$releasever&arch=$basearch&repo=centosplus #baseurl=http://mirror.centos.org/centos/$releasever/centosplus/$basearch/ gpgcheck=1 enabled=0 gpgkey=file:///etc/pki/rpm-gpg/RPM-GPG-KEY-CentOS-6
#contrib - packages by Centos Users [contrib] name=CentOS-$releasever - Contrib mirrorlist=http://mirrorlist.centos.org/?release=$releasever&arch=$basearch&repo=contrib #baseurl=http://mirror.centos.org/centos/$releasever/contrib/$basearch/ gpgcheck=1 enabled=0 gpgkey=file:///etc/pki/rpm-gpg/RPM-GPG-KEY-CentOS-6 |
centosplus][contrib]的内容不需要修改,它们的enabled值默认值是0,即模块不启用。
2.4
客户端测试!

附加:
DVD1和DVD2文件合并的步骤:
1.将DVD2光盘中Packages目录下所有的rpm文件CP到DVD1的目录下。
Cp /mnt/dvd2/Packages/*.rpm /var/www/html/yum/CentOS-6/Packages/
2.合并TRANS.TBL,将DVD2中TRANS.TBL的信息追加到DVD1中TRANS.TBL后面, 并排序保存。
cat mnt/dvd2/Packages/TRANS.TBL >> /var/www/html/yum/centos-6/Packages/TRANS.TBL
Mv /var/www/html/yum/centos-6/Packages/{TRANS.TBL,TRANS.TBL.BAK}
Sort /var/www/html/yum/centos-6/Packages/TRANS.TBL.BAK/var/www/html/yum/centos-6/Packages/TRANS.TBL
本文出自 “火星男-神自不凡” 博客,请务必保留此出处http://marsman.blog.51cto.com/6410055/1915511
本地搭建yum源方法【二】
