首页 > 代码库 > httpd 2.4.9 + mysql-5.5.33 + php-5.4.26编译安装过程
httpd 2.4.9 + mysql-5.5.33 + php-5.4.26编译安装过程
安装mariadb到/usr/local/下
解压到该目录
# tar xf mariadb-5.5.36-linux-x86_64.tar.gz -C /usr/local/

为后期方便升级使用给mariadb-5.5.36-linux-x86_64创个链接
# ln -sv mariadb-5.5.36-linux-x86_64/ mysql
 。
。
![]()
mysql的数据库文件默认是在/usr/local/mysql/data/下的,随着数据的增加,放这里不妥。创建逻辑卷来存放数据,以便后期随时扩展,创建好逻辑卷后挂载到/mydata/data/下。
mysql是由root启动后以普通用户mysql的身份来运行的,故添加系统组,系统用户:mysql,mysql。
修改/mydata/data/目录的属主属组
# chown -R mysql.mysql /mydata/data/
![]() 。
。
# cd /usr/local/mysql
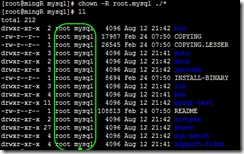
修改里面的所有文件属主root属组mysql:
# chown -R root.mysql ./*
 。
。
mysql的初始化:
因为在/etc/下已存在 my.cnf。所有新建
# mkdir /etc/mysql。
复制配置文件
# cp support-files/my-large.cnf /etc/mysql/my.cnf并编辑# vim /etc/mysql/my.cnf
![]() 。
。
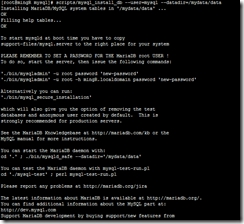
cd到/usr/local/mysql /下,要依赖此目录下的./bin。初始化数据库的脚本执行
# scripts/mysql_install_db --user=mysql --datadir=/mydata/data
 。
。
数据库已经生成
# ls /mydata/data
![]() 。
。
复制服务脚本
# cp support-files/mysql.server /etc/rc.d/init.d/mysqld
![]() 。
。
加到服务列表中
# chkconfig --add mysqld
![]()
![]() 。
。
启动服务
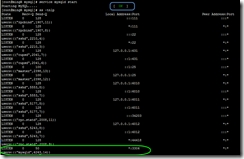
# service mysqld start
 。
。
此时还不能用mysql客户端,因为没有添加环境变量
# vim /etc/profile.d/mysql.sh
![]()

# source /etc/profile.d/mysql.sh

导出头文件
# ln -sv /usr/local/mysql/include/ /usr/include/mysql
![]() 。
。
更新版本客户端库
# vim /etc/ld.so.conf.d/mysql.conf
![]()

编译安装httpd,httpd程序依赖于apr和apr-util,故下载源码httpd-2.4.9.tar.bz2和apr-1.5.0.tar.bz2 ,apr-util-1.5.3.tar.bz2
先安装apr,解压
# tar xf apr-1.5.0.tar.bz2
cd到apr-1.5.0
执行
# ./configure –prefix=/usr/local/apr
# make && make install;
然后安装apr-util
# tar apr-util-1.5.3.tar.bz2
# cd apr-util-1.5.3
# ./configure –prefix=/usr/local/apr-util –with-apr=/usr/local/apr
# make && make install;
编译安装httpd
# tar xf httpd-2.4.9.tar.bz2
# cd httpd-2.4.9
#  ./configure --prefix=/usr/local/apache --sysconfdir=/etc/httpd24
--enable-so --enable-ssl --enable-cgi --enable-rewrite --with-zlib --with-pcre
--with-apr=/usr/local/apr --with-apr-util=/usr/local/apr-util
--enable-modules=most --enable-mpms-shared=all --with-mpm=event
#  make && make install。
配置http的启动;
# cd /etc/httpd24
为保险备份一份httpd.conf
# cp httpd.conf httpd.conf.bak
编辑httpd.conf
# vim httpd.conf
加入PidFile![]()
编辑
# vim /etc/rc.d/init.d/httpd24
提供SysV服务脚本到/etc/rc.d/init.d/httpd24
为其加执行权限
# chmod +x /etc/rc.d/init.d/httpd24
添加至服务列表中
# chkconfig --add httpd24
![]() 。
。
启动
# service http24 start.
编译安装php:
首先解决依赖关系,安装各包组和包
# yum -y groupinstall "Desktop Platform Development" # yum -y install
bzip2-devel libmcrypt-devel
# cd php-5.4.26
# ./configure --prefix=/usr/local/php --with-mysql=/usr/local/mysql
--with-openssl --with-mysqli=/usr/local/mysql/bin/mysql_config --enable-mbstring
--with-freetype-dir --with-jpeg-dir --with-png-dir --with-zlib
--with-libxml-dir=/usr --enable-xml  --enable-sockets
--with-apxs2=/usr/local/apache/bin/apxs --with-mcrypt
--with-config-file-path=/etc --with-config-file-scan-dir=/etc/php.d --with-bz2
--enable-maintainer-zts
# make && make install
# cd /etc/httpd24
# vim httpd.conf
添加
     AddType application/x-httpd-php  .php
     AddType application/x-httpd-php-source  .phps
找到 DirectoryIndex index.html 修改为 DirectoryIndex index.php index.html
# cp php.ini-production /etc/php.ini
重新载入
# service httpd24 reload即可
测试下php
# cd /usr/local/apache/htdocs/
# vim index.html

# mv index.html index.php
