首页 > 代码库 > zabbix监控服务器的11中状态
zabbix监控服务器的11中状态
安装了zabbix(此步骤跳过) 本机的Ip是:59.110.26.9
2.创建脚本目录
[root@web02 ~]# cd /etc/zabbix/
[root@web02 zabbix]# mkdir shells
3.上传zabbix UserParameter需要调用的脚本
[root@web02 zabbix]# cd shells/
[root@web02 shells]# ll
total 4
-rwxr-xr-x 1 root root 2854 Jan 28 12:12 zabbix_linux_plugin.sh
[root@web02 shells]# pwd
/etc/zabbix/shells
[root@web02 shells]#
[root@web02 shells]# chmod +x  zabbix_linux_plugin.sh
4.编写调用的agent UserParameter
[root@web02 shells]# cd  /etc/zabbix/zabbix_agentd.d/
[root@web02 zabbix_agentd.d]# ls
userparameter_mysql.conf  zabbix-linux-plugin.conf
[root@web02 zabbix_agentd.d]#
[root@web02 zabbix_agentd.d]# cat zabbix-linux-plugin.conf
UserParameter=linux_status[*],/etc/zabbix/shells/zabbix_linux_plugin.sh "$1" "$2" "$3"
[root@web02 zabbix_agentd.d]#

注意:上面的步骤配置完毕以后 要重启zabbix-agent  服务
5.服务端测试(zabbix-server端)
[root@web02 zabbix_agentd.d]# zabbix_get  -s   59.110.26.9  -k   linux_status[tcp_status,ESTAB]
/etc/zabbix/shells/zabbix_linux_plugin.sh: line 14: /tmp/netstat.tmp: Permission denied
4
[root@web02 zabbix_agentd.d]#

解决办法:chown zabbix.zabbix  /tmp/netstat.tmp
[root@web02 zabbix_agentd.d]# zabbix_get  -s   59.110.26.9  -k   linux_status[tcp_status,ESTAB]
4
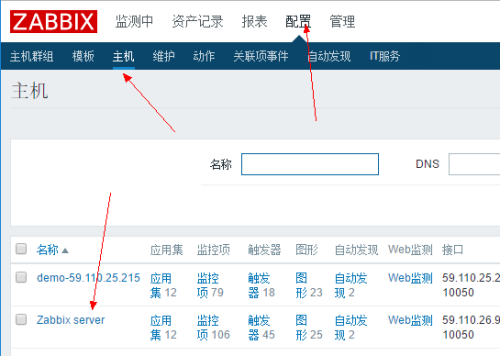
6.zabbix导入模板


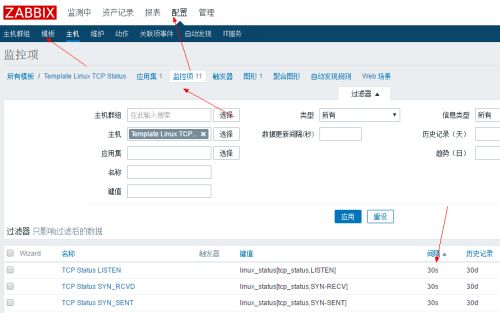
7.查看结果(模板默认的300s 生产场景 300s 测试可以修改模板的时间间隔。测试修改为30s)

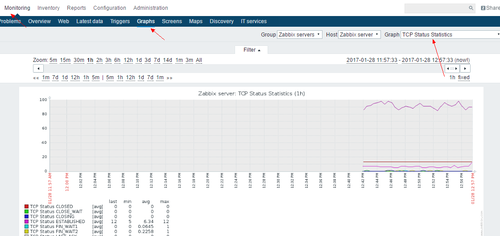
8.查看出图的结果

本文出自 “砖家博客” 博客,请务必保留此出处http://wsxxsl.blog.51cto.com/9085838/1894338
zabbix监控服务器的11中状态
声明:以上内容来自用户投稿及互联网公开渠道收集整理发布,本网站不拥有所有权,未作人工编辑处理,也不承担相关法律责任,若内容有误或涉及侵权可进行投诉: 投诉/举报 工作人员会在5个工作日内联系你,一经查实,本站将立刻删除涉嫌侵权内容。
