首页 > 代码库 > nagios+centreon总结之第三章——nagios+centreon简单配置
nagios+centreon总结之第三章——nagios+centreon简单配置
nagios+centreon配置
1.配置centreton web
①.启动服务:
chkconfig httpd on
chkconfig mysqld on
chkconfig --add ndo2db
chkconfig ndo2db on
chkconfig --add nagios
chkconfig nagios on
/etc/init.d/httpd restart
/etc/init.d/mysqld start
/etc/init.d/ndo2db start
/etc/init.d/nagios start
chkconfig centcore on #安装centreon时,自动完成的
chkconfig centstorage on #安装centreon时,自动完成的
②.centreon web 安装配置:
浏览器输入:
http://ip/centreon/install/setup.php
如果启动界面后出下面这种情况:
You have to enable Cookies to proceed with the installation

请换用firfox 浏览器重新打开。
如果出现错误,centreon 里提示不成功的,重新执行前面./install.sh -i 的安装:
rm -rf /usr/local/centreon
rm -rf /etc/centreon
rm -rf /etc/httpd/conf.d/centreon.conf
rm -rf /var/lib/centreon
./install.sh -i
2.设置centreon控制nagios
其实如果按照上面的步骤操作,默认都是设定好的,这里只是提示要注意的地方。
安装完成后,进入web界面会出现:

Some database poller updates are not active; check your nagios platform
可按照下面的步骤进行解决。
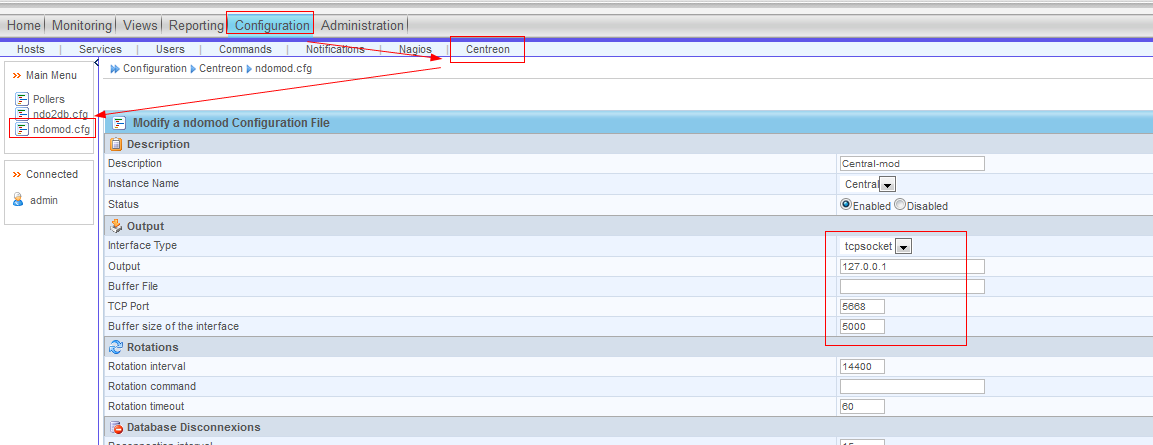
①. 在Nagios 中启用NDO 模块:

broker_module=/usr/local/nagios/bin//ndomod.o config_file=/usr/local/nagios/etc/ndomod.cfg

Output :127.0.0.1
TCP Port :5668
Buffer size of the interface :5000
②. 配置ndo2db,端口、socket type和ndomod.cfg一样:

③激活配置:
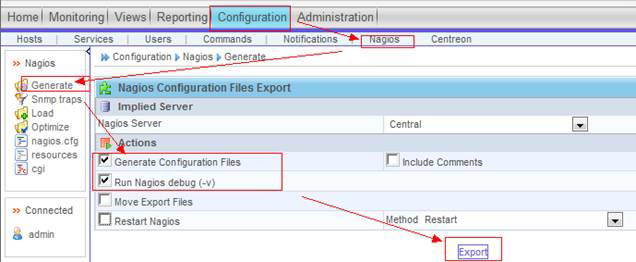
1)、测试配置是否有问题


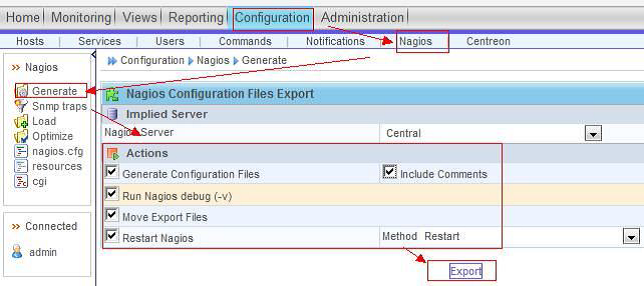
2)、Export 激活配置

第一次激活时,在/usr/local/nagios/etc 目录中会生成相应监控模板、主机、服务的配置文件:

注:以后每次修改配置文件,或添加新的Host、Service等,都需要执行这步”Export 激活配置”,才能生效!!
开始centreon+nagios的旅程吧!!!
nagios+centreon总结之第三章——nagios+centreon简单配置
