首页 > 代码库 > 基于linux系统nagios安装介绍(一)
基于linux系统nagios安装介绍(一)
基于linux系统nagios安装介绍(一)
实验环境:
(1)虚拟机操作系统:Centos6.7 32位
(2)nagios安装包:nagios-3.5.1-1.el6.i686
(3)nagios服务器端ip:192.168.100.120
(4)nagios客户端ip:192.168.100.113(即被监控端)
nagios介绍:
是一个开源软件,可以监控网络设备网络流量、 Linux/windows 主机状态,甚至可以监控打印机。它可以运行在 Linux 上或 windows 上,基于浏览器的 web 界面方便运维人员查看监控项目的状态。它支持 web 界面配置、管理操作、支持短信、邮件通知,可以自定义脚本实现自定义化监控。
安装步骤:
【服务器端】
安装扩展源
# yum install -y epel-release
安装nagios、nrpe相关的包
# yum install -y httpd nagios nagios-plugins nagios-plugins-all nrpe nagios-plugins-nrpe
设置nagios后台用户和密码
# htpasswd -c /etc/nagios/passwd nagiosadmin
编辑配置文件(暂无需改动)
# vim /etc/nagios/nagios.cfg
检测启动
# nagios -v /etc/nagios/nagios.cfg
# /etc/init.d/httpd start
# /etc/init.d/nagios start
浏览器访问
在浏览器中输入:ip(服务器端)/nagios
【客户端】
安装扩展源
# yum install -y epel-release
安装nagios、nrpe相关的包
# yum install -y nagios-plugins nagios-plugins-all nrpe nagios-plugins-nrpe
编辑配置文件
#vim /etc/nagios/nrpe.cfg 编辑配置文件
allowed_hosts=127.0.0.1 >>>>> 192.168.32.151,127.0.0.1
【服务端 IP, 多个 ip 用逗号隔开】
dont_blame_nrpe=0 >>>>>> dont_blame_nrpe=1 (这里不改也是可以的!)
启动客户端
# /etc/init.d/nrpe start
注:服务端和客户端通过 nrpe 来相互通信交换信息
【服务端操作】
创建监控服务文件
[root@jkkhj ~]# cd /etc/nagios
[root@jkkhj nagios]# ls
cgi.cfg conf.d nagios.cfg nrpe.cfg objects passwd private
[root@jkkhj nagios]# cd objects
[root@jkkhj objects]# ls
commands.cfg localhost.cfg switch.cfg timeperiods.cfg
contacts.cfg printer.cfg templates.cfg windows.cfg
[root@jkkhj objects]# cp localhost.cfg 192.168.100.113.cfg

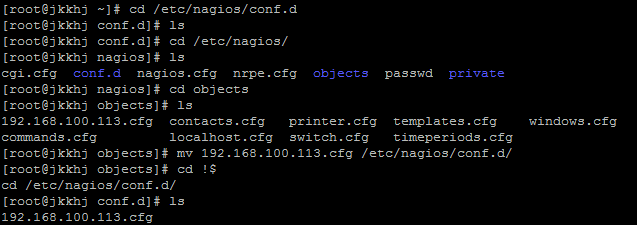
更改监控服务文件位置

更改监控服务文件内容
###############################################################################
###############################################################################
#
# HOST DEFINITION
#
###############################################################################
###############################################################################
define host{
use linux-server
host_name 192.168.100.113
alias 113
address 192.168.100.113
}
###############################################################################
#
# SERVICE DEFINITIONS
#
###############################################################################
###############################################################################
define service{
use generic-service
host_name 192.168.100.113
service_description check_ping
check_command check_ping!100.0,20%!200.0,50%
max_check_attempts 5
normal_check_interval 1
notification_interval 60
}
define service{
use generic-service
host_name 192.168.100.113
service_description check_ssh
check_command check_ssh
max_check_attempts 5
normal_check_interval 1
notification_interval 60
}
define service{
use local-service
host_name 192.168.100.113
service_description check_http
check_command check_http
max_check_attempts 5
normal_check_interval 1
notification_interval 60
}
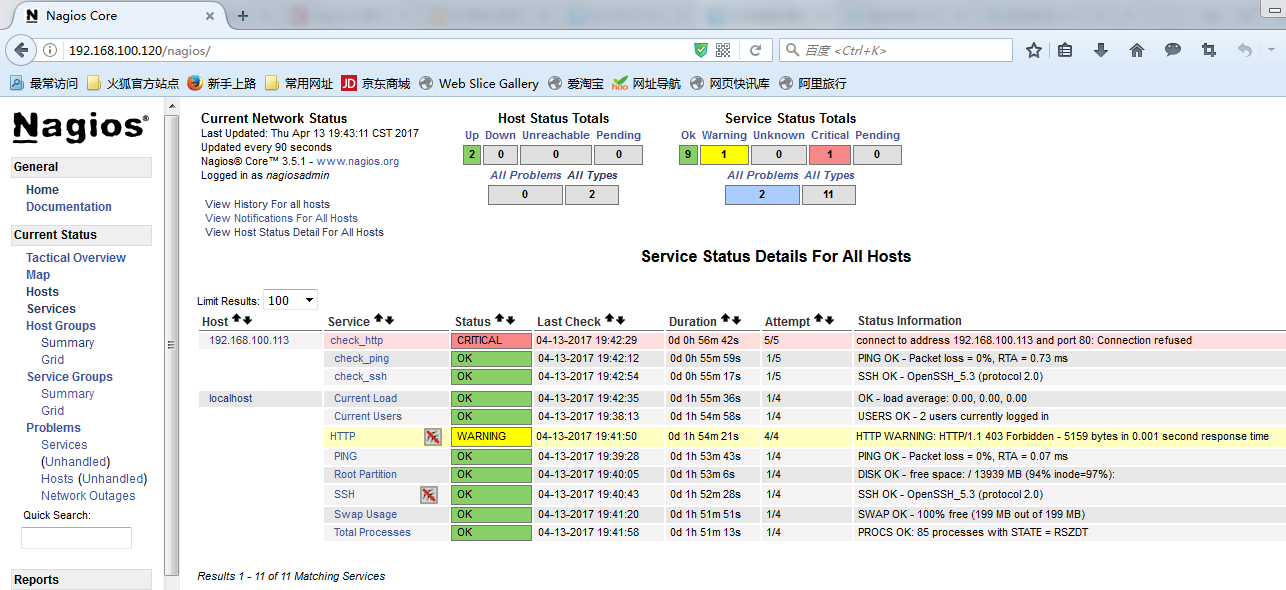
注:这里我定义了三个服务,分别是:ping,ssh和http。
检测启动
# nagios -v /etc/nagios/nagios.cfg 【检测错误】
# /etc/init.d/nagios restart 【重新启动nagios】
浏览器 ip/nagios
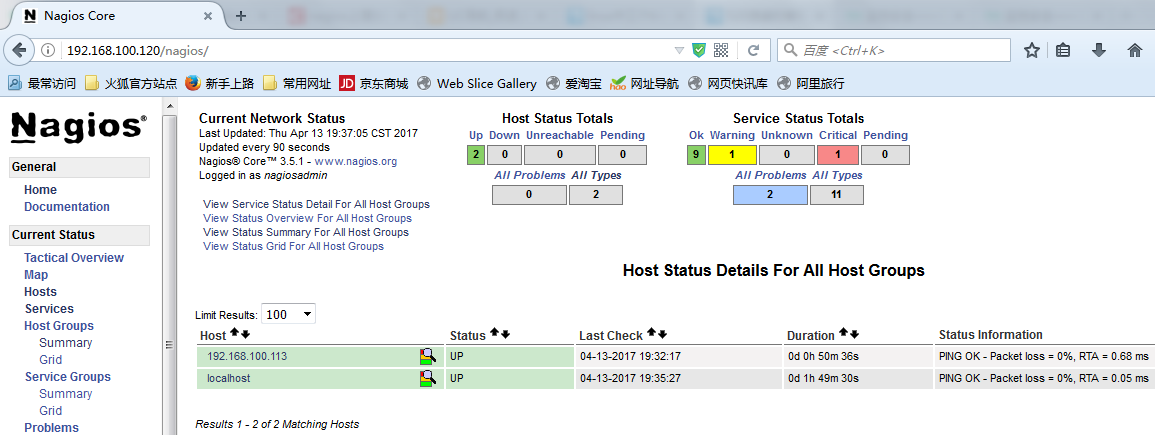
(1)点击host查看被监控主机

(2)点击services查看被监控主机中的服务!

本文出自 “圣骑士控魔之手” 博客,请务必保留此出处http://wutengfei.blog.51cto.com/10942117/1915815
基于linux系统nagios安装介绍(一)
