首页 > 代码库 > Solaris 10(x86)构建Oracle 10g RAC之--安装CRS
Solaris 10(x86)构建Oracle 10g RAC之--安装CRS
Solaris 10(x86)构建Oracle 10g RAC之--安装CRS
系统环境:
操作系统:Solaris 10(x86-64)
Cluster: Oracle CRS 10.2.0.1.0
Oracle: Oracle 10.2.0.1.0
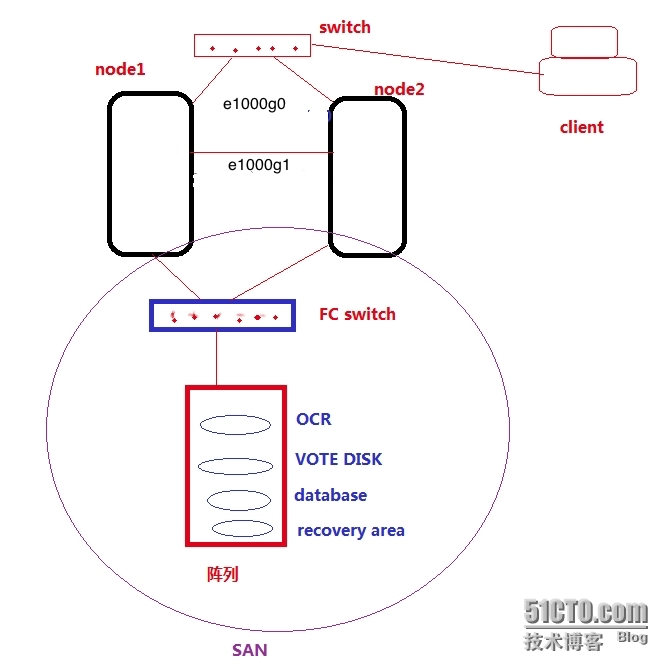
如图所示:RAC 系统架构
二、CRS 安装
Cluster Ready Service是Oracle 构建RAC,负责集群资源管理的软件,在搭建RAC中必须首先安装.
安装需采用图形化方式,以Oracle用户的身份安装(在node1上):
解压CRS安装包:
[oracle@node1:/export/home/oracle]$ unzip 10201_clusterware_solx86_64.zip
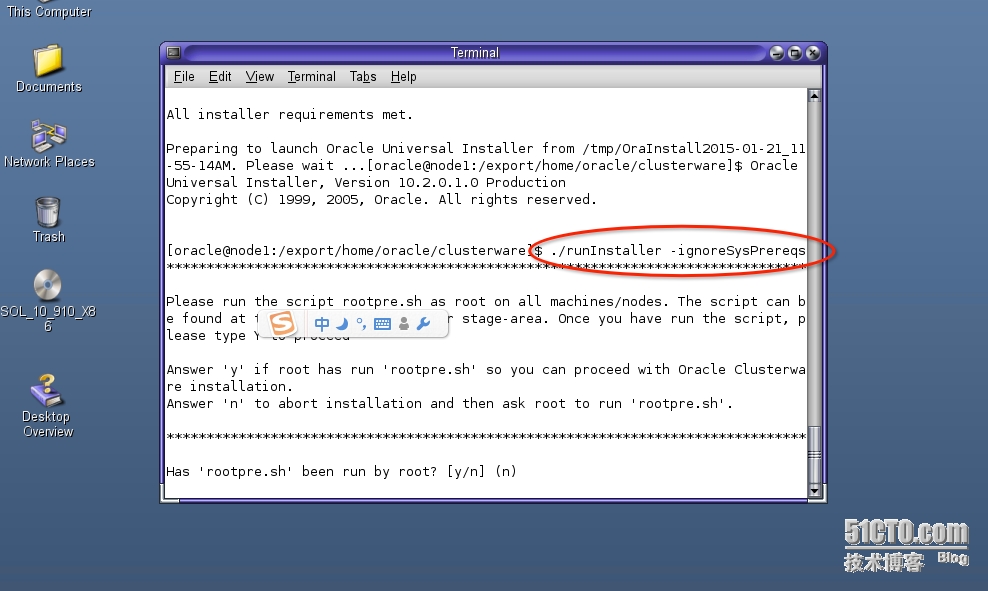
跳过系统环境检测:
[oracle@node1:/export/home/oracle/clusterware]$ ./runInstaller -ignoreSysPrereps

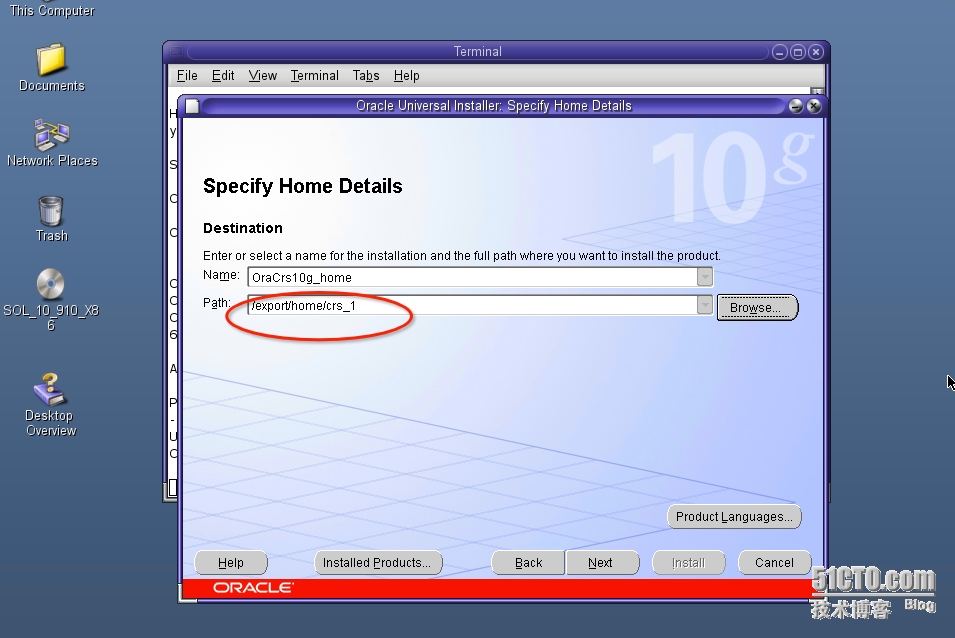
注意:以上安装路径为CRS安装路径
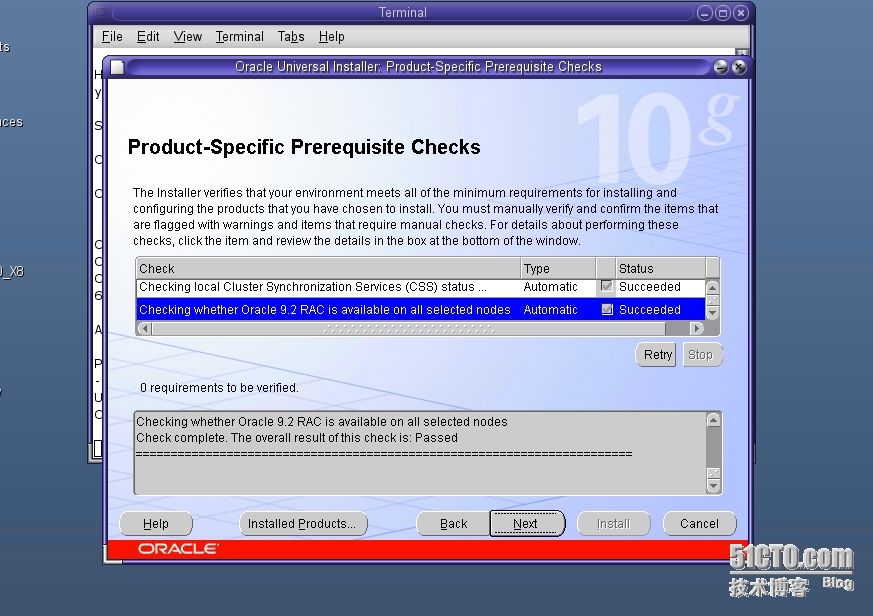
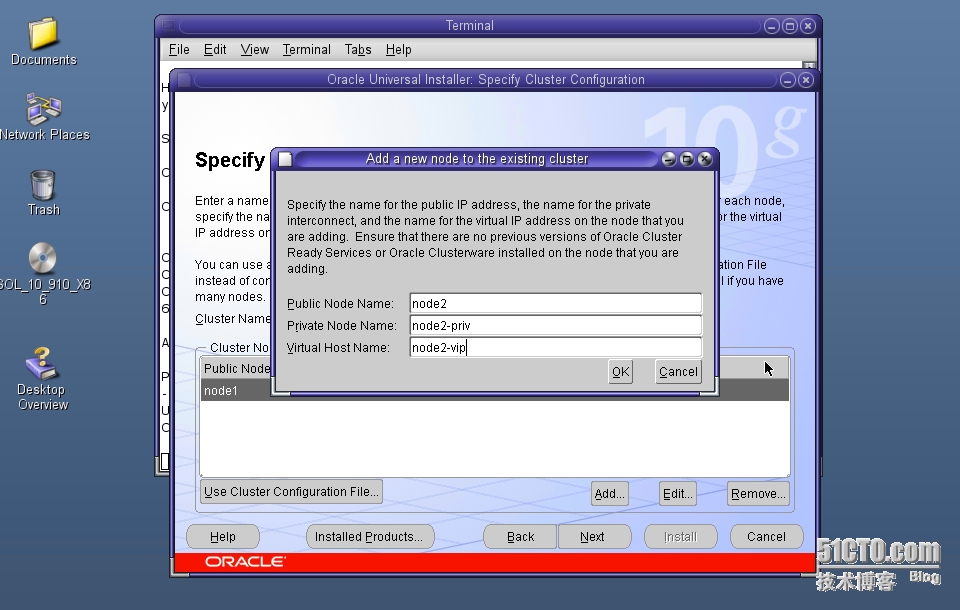
添加node2信息
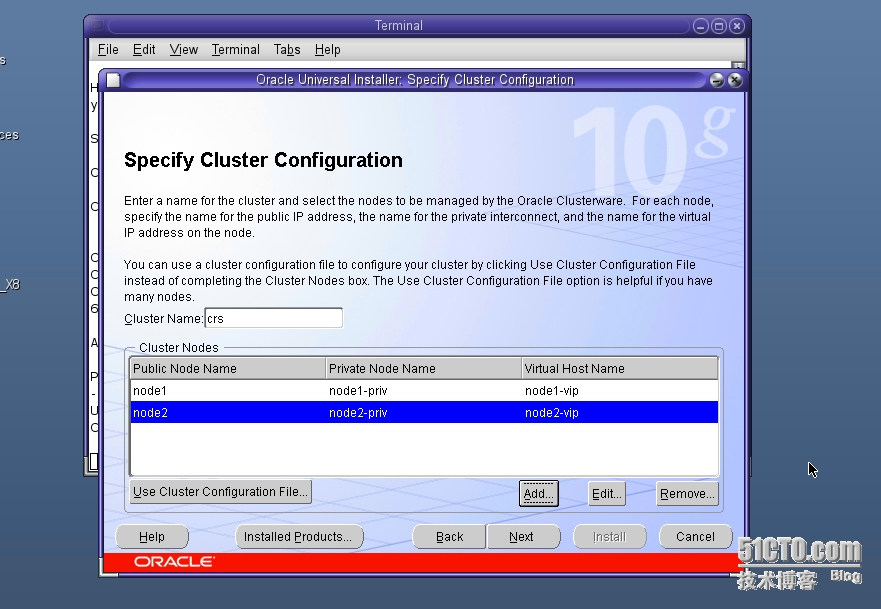
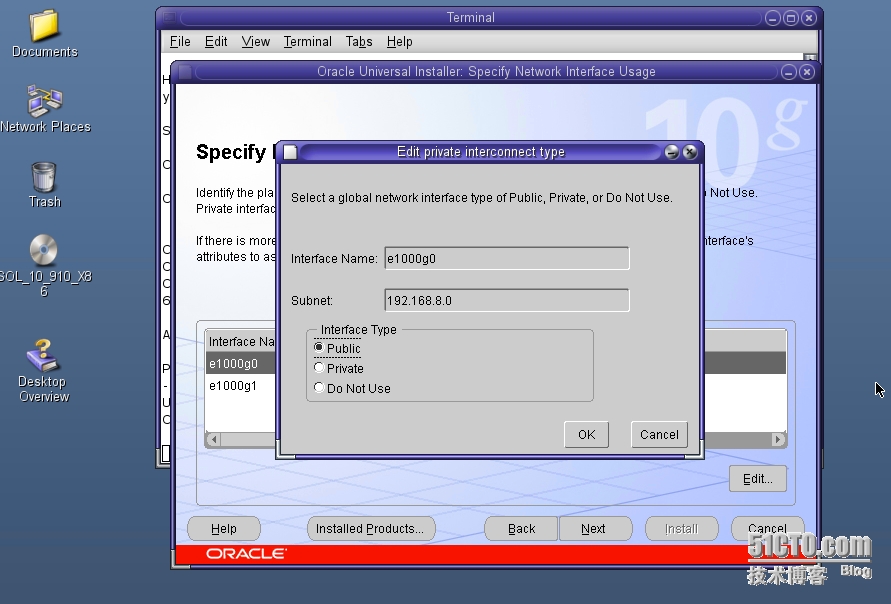
修改网络属性
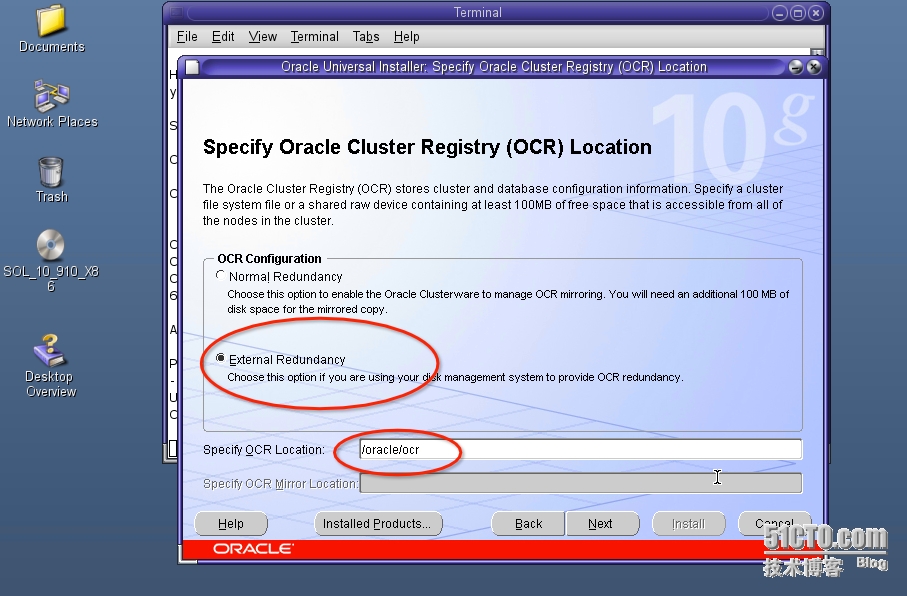
指定OCR磁盘位置
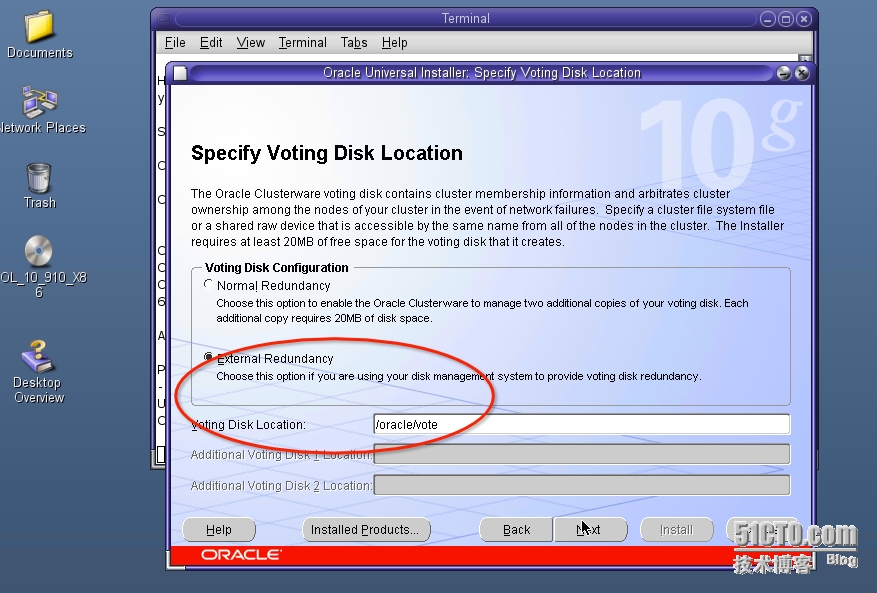
指定VOTE磁盘位置
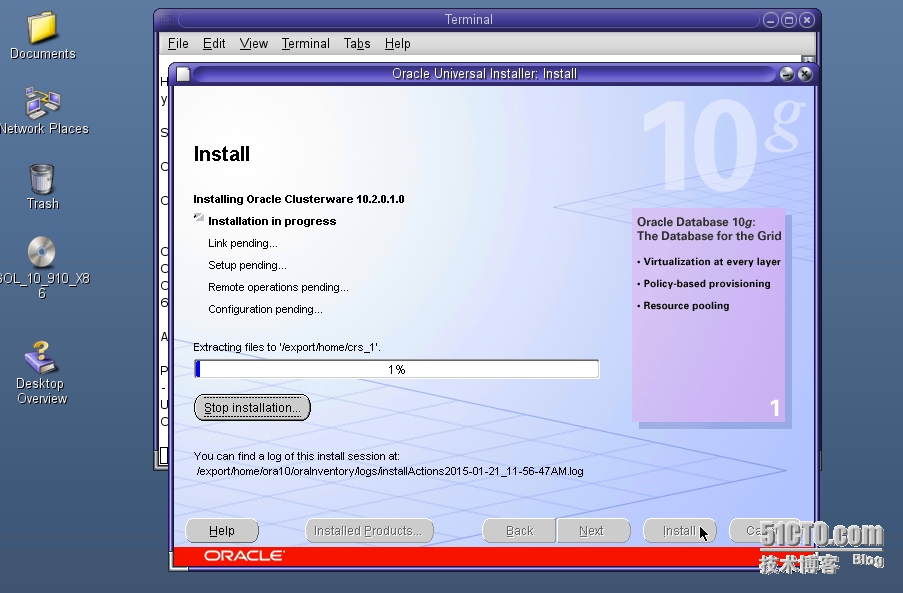
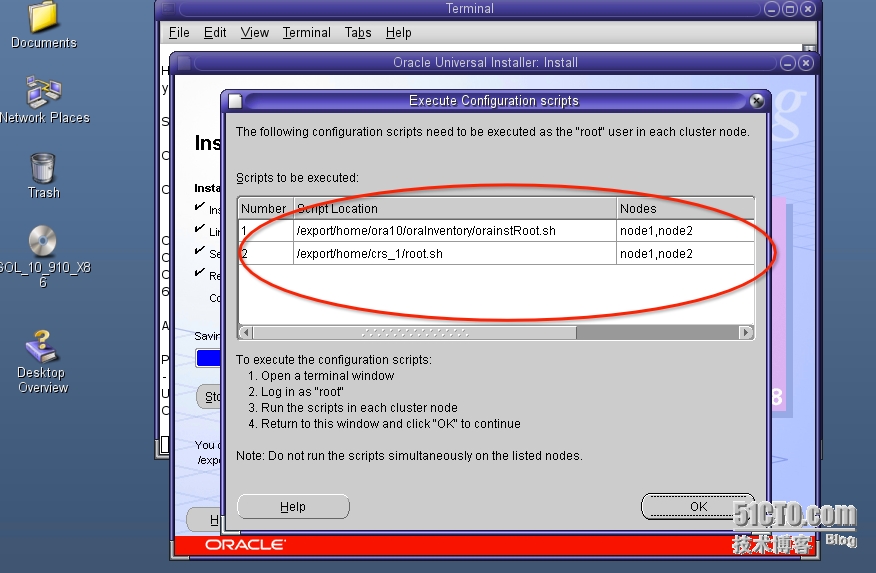
运行脚本:(所有node)
[root@node1:/]# /export/home/ora10/oraInventory/orainstRoot.sh
Changing permissions of /export/home/ora10/oraInventory to 770.
Changing groupname of /export/home/ora10/oraInventory to oinstall.
The execution of the script is complete

[root@node2:/]# /export/home/ora10/oraInventory/orainstRoot.sh
Changing permissions of /export/home/ora10/oraInventory to 770.
Changing groupname of /export/home/ora10/oraInventory to oinstall.
The execution of the script is complete
[root@node1:/]# /export/home/crs_1/root.sh
Checking to see if Oracle CRS stack is already configured
Setting the permissions on OCR backup directory
Setting up NS directories
Oracle Cluster Registry configuration upgraded successfully
Successfully accumulated necessary OCR keys.
Using ports: CSS=49895 CRS=49896 EVMC=49898 and EVMR=49897.
node <nodenumber>: <nodename> <private interconnect name> <hostname>
node 1: node1 node1-priv node1
node 2: node2 node2-priv node2
Creating OCR keys for user ‘root‘, privgrp ‘root‘..
Operation successful.
Now formatting voting device: /oracle/vote
Format of 1 voting devices complete.
Startup will be queued to init within 30 seconds.
Adding daemons to inittab
Expecting the CRS daemons to be up within 600 seconds.
CSS is active on these nodes.
        node1
CSS is inactive on these nodes.
        node2
Local node checking complete.
Run root.sh on remaining nodes to start CRS daemons.

[root@node2:/]# /export/home/crs_1/root.sh
Checking to see if Oracle CRS stack is already configured
Setting the permissions on OCR backup directory
Setting up NS directories
Oracle Cluster Registry configuration upgraded successfully
clscfg: EXISTING configuration version 3 detected.
clscfg: version 3 is 10G Release 2.
Successfully accumulated necessary OCR keys.
Using ports: CSS=49895 CRS=49896 EVMC=49898 and EVMR=49897.
node <nodenumber>: <nodename> <private interconnect name> <hostname>
node 1: node1 node1-priv node1
node 2: node2 node2-priv node2
clscfg: Arguments check out successfully.
NO KEYS WERE WRITTEN. Supply -force parameter to override.
-force is destructive and will destroy any previous cluster
configuration.
Oracle Cluster Registry for cluster has already been initialized
Startup will be queued to init within 30 seconds.
Adding daemons to inittab
Expecting the CRS daemons to be up within 600 seconds.
CSS is active on these nodes.
        node1
        node2
CSS is active on all nodes.
Waiting for the Oracle CRSD and EVMD to start
Oracle CRS stack installed and running under init(1M)
Running vipca(silent) for configuring nodeapps
Creating VIP application resource on (2) nodes...
Creating GSD application resource on (2) nodes...
Creating ONS application resource on (2) nodes...
Starting VIP application resource on (2) nodes...
Starting GSD application resource on (2) nodes...
Starting ONS application resource on (2) nodes...
Done.
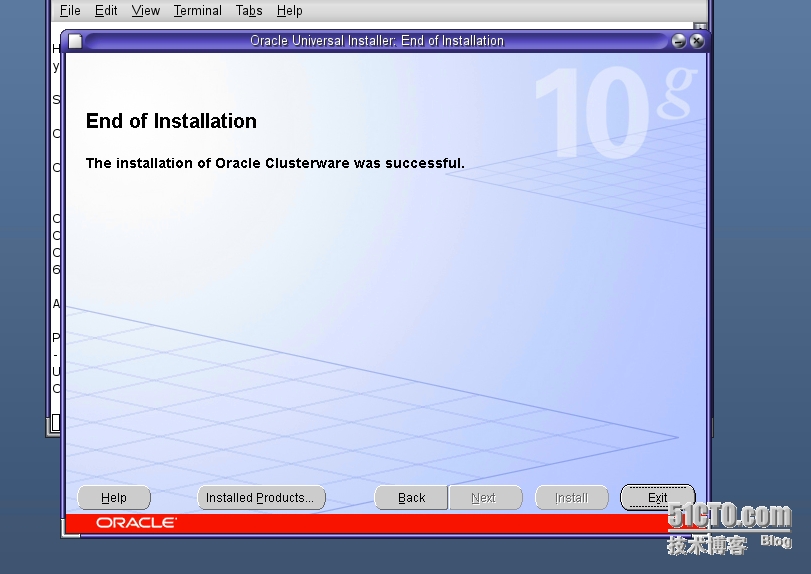
@脚本运行成功 !
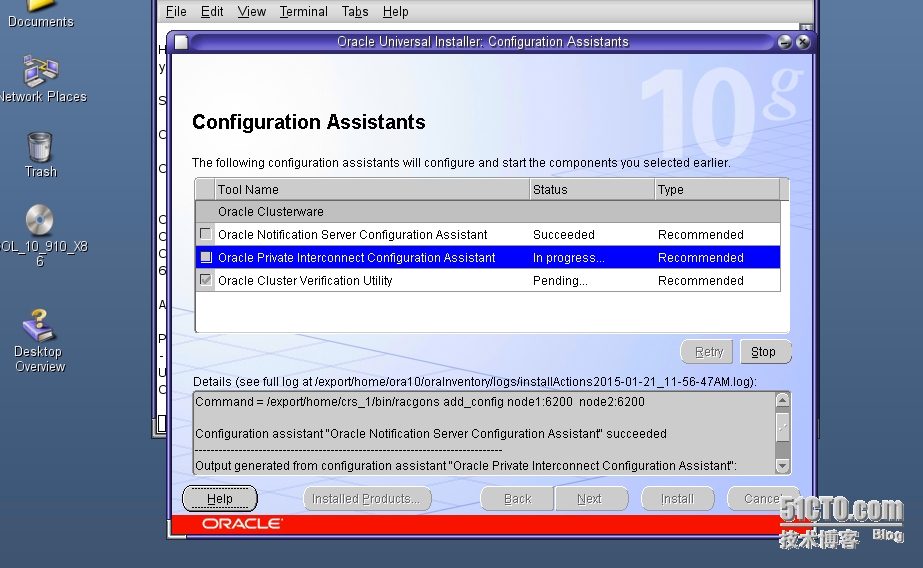
查看CRS服务和资源信息:
[root@node2:/]# vi /etc/profile
export PATH=$PATH:/export/home/crs_1/bin

[root@node1:/]# crsctl check crs
CSS appears healthy
CRS appears healthy
EVM appears healthy

[root@node1:/]# crs_stat -t
Name           Type           Target    State     Host
------------------------------------------------------------
ora.node1.gsd  application    ONLINE    ONLINE    node1
ora.node1.ons  application    ONLINE    ONLINE    node1
ora.node1.vip  application    ONLINE    ONLINE    node1
ora.node2.gsd  application    ONLINE    ONLINE    node2
ora.node2.ons  application    ONLINE    ONLINE    node2
ora.node2.vip  application    ONLINE    ONLINE    node2

[root@node2:/]# crsctl check crs
CSS appears healthy
CRS appears healthy
EVM appears healthy

[root@node2:/]# crs_stat -t
Name           Type           Target    State     Host
------------------------------------------------------------
ora.node1.gsd  application    ONLINE    ONLINE    node1
ora.node1.ons  application    ONLINE    ONLINE    node1
ora.node1.vip  application    ONLINE    ONLINE    node1
ora.node2.gsd  application    ONLINE    ONLINE    node2
ora.node2.ons  application    ONLINE    ONLINE    node2
ora.node2.vip  application    ONLINE    ONLINE    node2
@至此,CRS安装成功!
本文出自 “天涯客的blog” 博客,请务必保留此出处http://tiany.blog.51cto.com/513694/1606947
Solaris 10(x86)构建Oracle 10g RAC之--安装CRS
声明:以上内容来自用户投稿及互联网公开渠道收集整理发布,本网站不拥有所有权,未作人工编辑处理,也不承担相关法律责任,若内容有误或涉及侵权可进行投诉: 投诉/举报 工作人员会在5个工作日内联系你,一经查实,本站将立刻删除涉嫌侵权内容。
