首页 > 代码库 > oracle清屏翻页配置
oracle清屏翻页配置
在oracle数据库刚安装好时,输入命令时不能跟mysql数据库一样,清楚屏幕上执行过的命令和翻页重复执行上次执行过的命令,输错命令是也不能移动光标进行修改,那么这在工作中是很不方便的。那这篇文档就是安装工具,使oracle能够支持清屏翻页及自由移动光标。
首先下载三个源码包
1)IO-Tty-1.07.tar.gz
2)Term-ReadLine-Gnu-1.16.tar.gz
3)uniread-1.01.tar.gz
2、安装
1)解压缩至本地
[root@oracle Desktop]# tar -xvf IO-Tty-1.07.tar.gz
[root@oracle Desktop]# tar -xvf Term-ReadLine-Gnu-1.16.tar.gz
[root@oracle Desktop]# tar -xvf uniread-1.01.tar.gz

2)安装第一个包
[root@oracle Desktop]# cd IO-Tty-1.07
[root@oracle IO-Tty-1.07]# perl Makefile.PL
[root@oracle IO-Tty-1.07]# make
[root@oracle IO-Tty-1.07]# make install
3)安装第二个包
[root@oracle IO-Tty-1.07]# cd../Term-ReadLine-Gnu-1.16
[root@oracle Term-ReadLine-Gnu-1.16]# perlMakefile.PL
[root@oracle Term-ReadLine-Gnu-1.16]# make
[root@oracle Term-ReadLine-Gnu-1.16]# makeinstall
4)安装第三个包
[root@oracle Term-ReadLine-Gnu-1.16]# cd../uniread-1.01
[root@oracle uniread-1.01]# perl Makefile.PL
[root@oracle uniread-1.01]# make
[root@oracle uniread-1.01]# make install
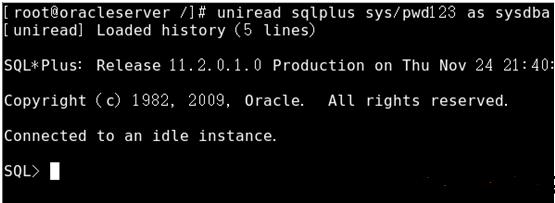
3、登录oracle:在命令前加 uniread
原来登录是: sqlplus sys/123456 AS SYSDBA
现在是: uniread sqlplus sys/123456 AS SYSDBA

本文出自 “11664854” 博客,请务必保留此出处http://11674854.blog.51cto.com/11664854/1883476
oracle清屏翻页配置
