首页 > 代码库 > Windows azure下的Linux vm密码重置
Windows azure下的Linux vm密码重置
Windows azure下的Linux vm密码重置
上一篇我们介绍了windows azure下的windows vm下的密码忘记重置,今天介绍一下,在windows azure下的linux vm的密码重置。
密码忘记有两种方式,一种是知道需要重置的账户密码,一一种是不知道需要重置的密码。
比如上届管理员创建完后工作没交接就走了,本届管理员不知道密码,不知道重置那个密码,所以windows azure就用覆盖的方法来完成从重置密码操作。
先决条件
微软 Azure Linux 代理 2.0.5 或更高版本。请注意,大多数 Azure 虚拟机 Linux 镜像库都包含 2.0.5 版本。您可以通过运行 waagent -version 来确认此版本已安装在虚拟机中。为保证扩展程序最佳用户体验,建议按照本文结尾“其他注意事项”中的步骤更新到最新版本。
Azure PowerShell。请注意,针对扩展程序的跨平台 CLI 支持有望在未来几周内推出。
您想要对您的 VM 重置的新密码或 SSH 密钥。
使用 VMAccess 扩展程序
根据您想要为 VM 重置的内容,VMAccess 的使用有 5 种场景。以下将介绍这些场景和对应的 PowerShell 示例脚本。请注意,您只需为每种场景指定不同的参数,“开始执行” 这行注释之后的第二部分在不同场景中均相同。脚本非常简单。
(如果你使用的是Ubuntu,需要将上述命令中的“waagent” 替换为“walinuxagent”)
注意:1. 如需要更新到其他版本,请参看GitHub说明。2. 运行以上命令需要Root权限。
接下来我们演示一下,我们知道linux一般都通过ssl工具登陆
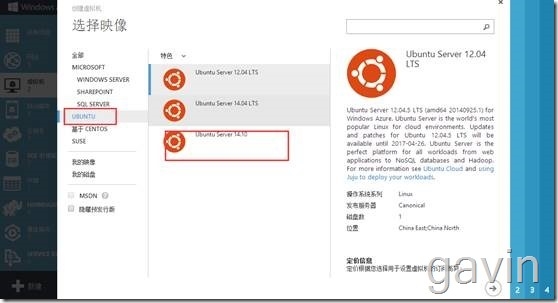
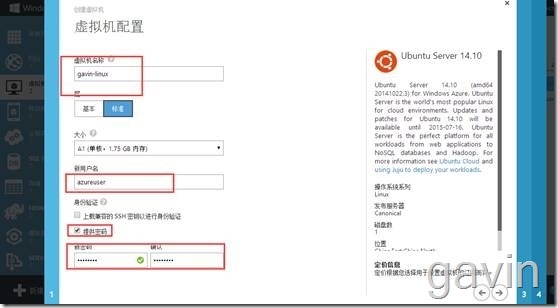
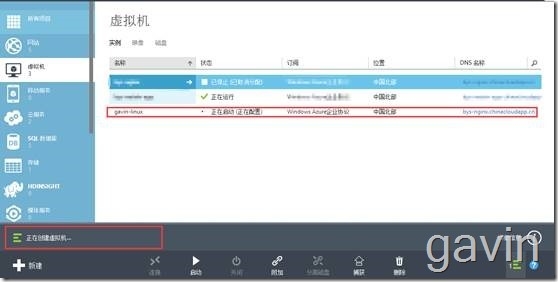
创建linux 计算机
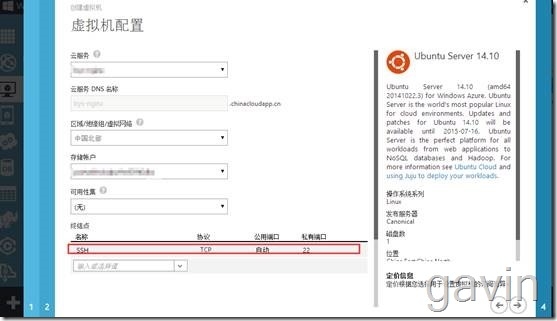
默认开放的端口
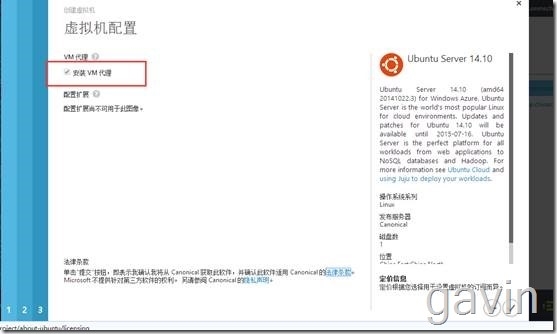
默认也是安装代理的
正在创建vm
我们通过xshell来登陆
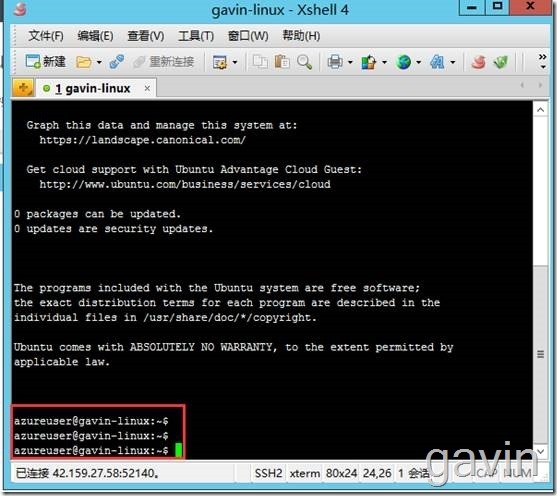
我们知道ubuntu默认root是不启用的,所以我们需要给root设置一个密码,然后切换到root
Sudo passwd root

然后通过
su root
切换到root下

查看有那些用户可以登陆该系统

我系统下有azureuser、root两个用户,我如果root密码忘记了或者azureuser密码忘记了我应该怎么做呢,需要通过powershell azure进行重置。
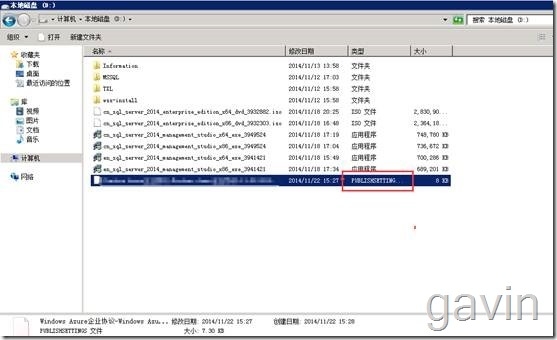
我们下载了windows azure powershel,那windows azure poershell跟系统自带的windows powershell有什么区别呢,最大的区别就是有没有azure相关的服务模块,再次也不多介绍了,有了powershell 后,我们需要windows azure的订阅文件,我们需要通过访问windows azure的portal界面进行下载或者通过powershell下载。
https://manage.windowsazure.cn/publishsettings/index?client=powershell
运行windows azure powershell
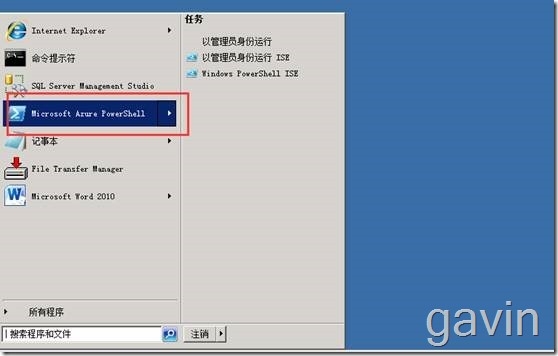
导入订阅文件
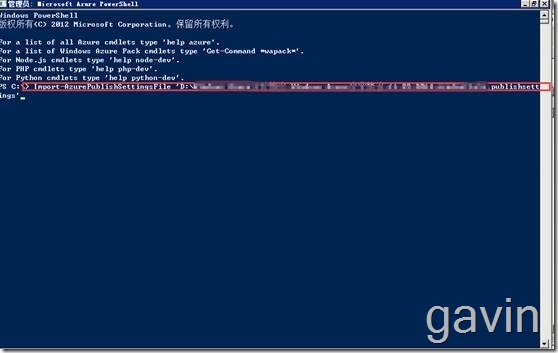
订阅文件导入成功。

因为我环境下有多个订阅,所以我们需要设置默认的订阅
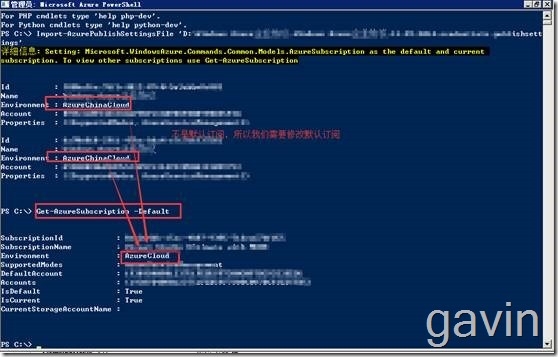
检查Azure PowerShell中默认的Azure账户是不是自己想要操作的账户:
输入命令:
Get-AzureSubscription –Default
,检查出来的结果中会出现Subscription ID,查看一下这个Sub ID是否是自己Azure管理平台上的订阅ID.
如果Sub ID不同,那么需要重新设置默认账户(如果您是首次操作,那么应该会是相同的)。更改命令:
Select- Select-AzureSubscription -SubscriptionName "添加账户名" -Default

注:如果一个订阅文件下有多个订阅id的话,我们也可以选择修改指定的订阅id为默认

修改后,我们输入命令
Get-AzureVM
(查到自己的虚拟机名称及云服务名称)

输入命令
$VM = Get-AzureVM -ServiceName "xxxx" -Name "mxxx"
定义一个变量vm,然后查看当前服务的信息
#指定虚拟机
$vm = Get-AzureVM -ServiceName ‘MyServiceName’ -Name ‘MyVMName’

(查看输出结果是否是‘True’) 如果安装代理,返回的结果为true
$vm.GetInstance().ProvisionGuestAgent = $true
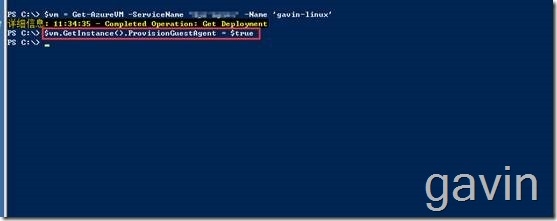
#输入您当前的用户名和新密码
$UserName = "CurrentName"
$Password = "NewPassword"
$PrivateConfig = ‘{"username":"‘+ $UserName + ‘", "password":"‘ +  $Password + ‘""‘
#开始执行
$ExtensionName = ‘VMAccessForLinux‘
$Publisher = ‘Microsoft.OSTCExtensions‘
$Version = ‘1.0‘
Set-AzureVMExtension -ExtensionName $ExtensionName -VM $vm -Publisher $Publisher -Version $Version -PrivateConfiguration $PrivateConfig | Update-AzureVM

通过新密码登陆。
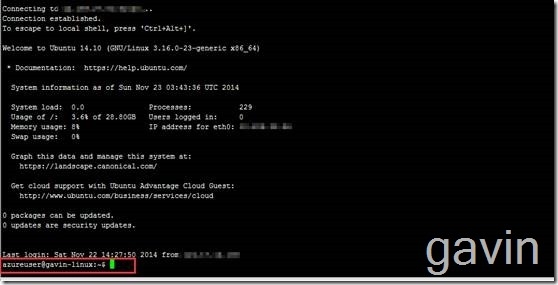
windows azure命令结合:
http://msdn.microsoft.com/en-us/library/dn495240.aspx
注意:官网上的代码标点符号有问题,所以执行起来会有问题:
我们可以将以上代码写为一个.ps文件去执行即可。
$vm = Get-AzureVM -ServiceName ‘?ZZtestlinux’?¥ -Name ‘?ZZtestlinux’?¥
$vm.GetInstance().ProvisionGuestAgent = $true
$UserName = "azureuser"
$Password = "Password2014"
$PrivateConfig = ‘{"username":"‘+ $UserName + ‘", "password":"‘ + $Password + ‘"}‘
$ExtensionName = ‘VMAccessForLinux‘
$Publisher = ‘Microsoft.OSTCExtensions‘
$Version = ‘1.0‘
Set-AzureVMExtension -ExtensionName $ExtensionName -VM $vm -Publisher $Publisher -Version $Version -PrivateConfiguration $PrivateConfig | Update-AzureVM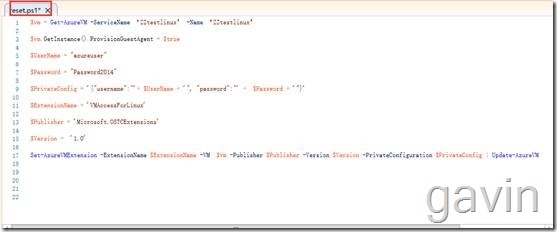
2. Reset the SSH key only
#Sample script to reset your SSH keys
#Identify the VM
$vm = Get-AzureVM -ServiceName ‘MyServiceName’ -Name ‘MyVMName’
#Enter the current user name and the path of your new public SSH key
$UserName = "CurrentName"
$cert = Get-Content "CertPath"
$PrivateConfig = ‘{"username":"‘ + $UserName + ‘", "ssh_key":"‘ + $cert + ‘"}‘
# Begin execution
$ExtensionName = ‘VMAccessForLinux‘
$Publisher = ‘Microsoft.OSTCExtensions‘
$Version = ‘1.0‘
Set-AzureVMExtension -ExtensionName $ExtensionName -VM $vm -Publisher $Publisher -Version $Version -PrivateConfiguration $PrivateConfig | Update-AzureVM
3. Reset the password and the SSH key
#Sample script to reset your password and SSH key
#Identify the VM
$vm = Get-AzureVM -ServiceName ‘MyServiceName’ -Name ‘MyVMName’
#Enter the new password, and cert path of the new SSH public key, with the current user name
$UserName = "CurrentName"
$Password = "NewPassword"
$cert = Get-Content "CertPath"
$PrivateConfig = ‘{"username":"‘ + $UserName + ‘", "password": "‘ + $Password + ‘", "ssh_key":"‘ + $cert + ‘"}‘
# Begin execution
$ExtensionName = ‘VMAccessForLinux‘
$Publisher = ‘Microsoft.OSTCExtensions‘
$Version = ‘1.0‘
Set-AzureVMExtension -ExtensionName $ExtensionName -VM $vm -Publisher $Publisher -Version $Version -PrivateConfiguration $PrivateConfig | Update-AzureVM
4. Create a new sudo user account
If you forget your user name, you can use VMAccess to create a new one with the sudo authority. Note in this case, your original user name and login keys will not be modified, it should still work.
To create a new sudo user with password access, use the script in scenario 1; for creating a new sudo user with SSH key access, use the script in scenario 2; you can also use scenario 3 to create a new user with both access; remember you need to change the “UserName” to a new user name.
5. Reset the SSH configuration
If the SSH configuration is messed up, you might also lose the access to the VM. You can use VMAccess extension to reset the configuration to default. To do so, you just need to remove all the new access parameters in the configuration (user name, password, or SSH key). The extension will restart the SSH server, open the SSH port on your VM, and reset the SSH configuration to default. The user account (password or SSH keys) of your VM remains unchanged.
Note, The SSH configuration file that get reset is located at /etc/ssh/sshd_config.
#Sample script to reset the SSH configuration on your VM
#Identify the VM
$vm = Get-AzureVM -ServiceName ‘MyServiceName’ -Name ‘MyVMName’
$PrivateConfig = ‘{"reset_ssh": "True"}‘
# Begin execution
$ExtensionName = ‘VMAccessForLinux‘
$Publisher = ‘Microsoft.OSTCExtensions‘
$Version = ‘1.0‘
Set-AzureVMExtension -ExtensionName $ExtensionName -VM $vm -Publisher $Publisher -Version $Version -PrivateConfiguration $PrivateConfig | Update-AzureVM
Query the results
The status of the VMAccess extension could be retrieved using Azure PowerShell Cmdlet Get-AzureVM or Get-Deployment.
Access the VM after resetting
After the VMAccess Extension completes resetting the credentials and configurations, you can log on to the instance using the new account name, password or SSH key.
Additional Notes
Note if you only want to reset the password or SSH key for the existing user account, you need to make sure the user name you entered matches the original user name. If you enter a name that is different from your original name, the VMAccess extension will consider this as scenario 4 listed above, and create a new user account.
Known issue
When you run the PowerShell command “Set-AzureVMExtension” on Linux VM, you may hit following error: “Provision Guest Agent must be enabled on the VM object before setting IaaS VM Access Extension”.
Root Cause: when you create the image via portal, the value of guest agent on the VM is not always set to “True”. If your VM is created using PowerShell, you will not see this issue.
Resolution: Add the following PowerShell command to set the ProvisionGuestAgent to “True”;
$vm = Get-AzureVM -ServiceName ‘MyServiceName’ -Name ‘MyVMName’
$vm.GetInstance().ProvisionGuestAgent = $true
本文出自 “高文龙” 博客,请务必保留此出处http://gaowenlong.blog.51cto.com/451336/1582670
Windows azure下的Linux vm密码重置
