首页 > 代码库 > 配置Android插件并使用unity调用
配置Android插件并使用unity调用
方法一:发布eclipse android工程(如图勾选),如同IOS发布xcode一样,在eclipse中编写调用
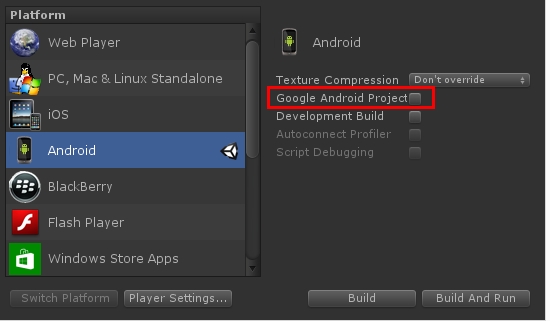
方法二:使用eclipse发布插件在unity中调用
eclipse中配置要点:
操作过程:
1.新建Android工程,注意包路径比如我的是com.zxkj,cyy,其他步骤直接下一步完成

2.右击Android工程项目导入unity 安装包中.class.jar包
Unity安装包中路径:Uniy\Editor\Data\PlaybackEngines\androidplayer\release\bin\class.jar
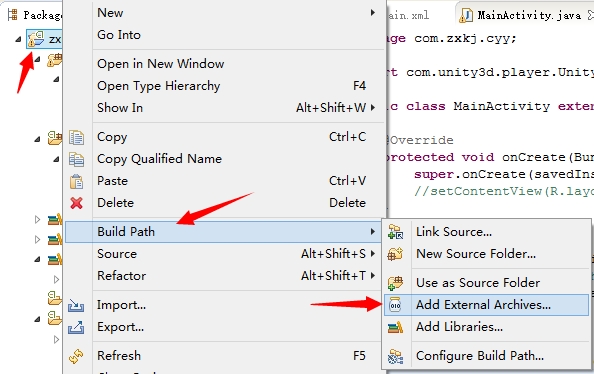
导入结果

3.编辑MainActivity
代码如:
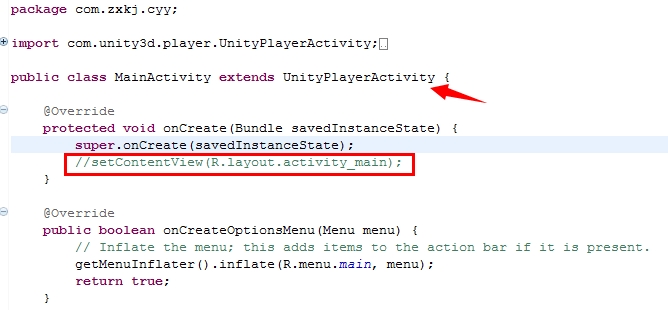
继承UnityPlayerActivity,注释红框那行代码,因为不需要使用Android自己的视图,使用的是untiy自己场景;
4.配置主文件AndroidManifest.xml,最好参考unity安装包中的AndroidManifest.xml进行配置,原理就不多说了
unity中的AndroidManifest.xml
<?xml version="1.0" encoding="utf-8"?>
<manifest
    xmlns:android="http://schemas.android.com/apk/res/android"
    package="com.unity3d.player"
android:installLocation="preferExternal"
android:theme="@android:style/Theme.NoTitleBar"
    android:versionCode="1"
    android:versionName="1.0">
    <supports-screens
        android:smallScreens="true"
        android:normalScreens="true"
        android:largeScreens="true"
        android:xlargeScreens="true"
        android:anyDensity="true"/>

    <application
android:icon="@drawable/app_icon"
        android:label="@string/app_name"
        android:debuggable="true">
        <activity android:name="com.unity3d.player.UnityPlayerNativeActivity"
                  android:label="@string/app_name">
            <intent-filter>
                <action android:name="android.intent.action.MAIN" />
                <category android:name="android.intent.category.LAUNCHER" />
            </intent-filter>
            <meta-data android:name="unityplayer.UnityActivity" android:value="http://www.mamicode.com/true" />
            <meta-data android:name="unityplayer.ForwardNativeEventsToDalvik" android:value="http://www.mamicode.com/false" />
        </activity>
    </application>
</manifest>
配置后的Android工程中AndroidManifest.xml,差别语句自己对照未修改的文件,思考下为什么,至于一些系统访问权限自己继续添加
<?xml version="1.0" encoding="utf-8"?>
<manifest
    xmlns:android="http://schemas.android.com/apk/res/android"
    package="com.unity3d.player"
android:installLocation="preferExternal"
android:theme="@android:style/Theme.NoTitleBar"
    android:versionCode="1"
    android:versionName="1.0">
    <supports-screens
        android:smallScreens="true"
        android:normalScreens="true"
        android:largeScreens="true"
        android:xlargeScreens="true"
        android:anyDensity="true"/>

    <application
android:icon="@drawable/app_icon"
        android:label="@string/app_name"
        android:debuggable="true">
        <activity android:name="com.unity3d.player.UnityPlayerNativeActivity"
                  android:label="@string/app_name">
            <intent-filter>
                <action android:name="android.intent.action.MAIN" />
                <category android:name="android.intent.category.LAUNCHER" />
            </intent-filter>
            <meta-data android:name="unityplayer.UnityActivity" android:value="http://www.mamicode.com/true" />
            <meta-data android:name="unityplayer.ForwardNativeEventsToDalvik" android:value="http://www.mamicode.com/false" />
        </activity>
    </application>
</manifest>
5.提取插件,复制到Unity工程Assets\Plugins\Android文件夹内,也可以使用发布插件方法发布在这就不多介绍

解压插件包,结果图
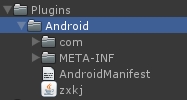
如果插件有用到Android视图还需要复制res资源文件
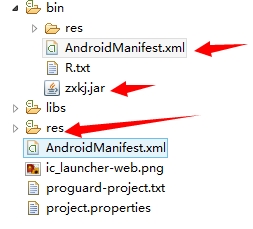
到这就结束了插件设置
Unity配置和使用
1.注意包需要和Android新建工程的包路径统一
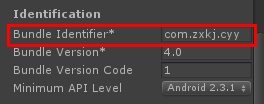
2.访问android中方法:
AndroidJavaClass jc = new AndroidJavaClass("com.unity3d.player.UnityPlayer");
                  AndroidJavaObject jo = jc.GetStatic<AndroidJavaObject>("currentActivity");
jo.Call(调用的Android方法名,调用方法的参数);
配置Android插件并使用unity调用
