
首页 > 代码库 > pygame系列小程序:奔跑的小车
pygame系列小程序:奔跑的小车
最近一个星期学习了一下python的pygame模块,顺便做个小程序巩固所学的,运行效果如下:

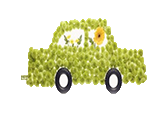
其中,背景图"highway.jpg"是使用PhotoShop将其分辨率改变为640 × 480,而小车"car.png"则是将其转变为png格式的图片,并且填充其背景色,让其拥有透明性。
==========================================
代码
==========================================
# -*- coding: utf-8 -*-

# 背景图以及移动小车图
highway_image_name = "highway.jpg"
car_image_name = "car.png"

# 导入程序相关的模块
import pygame
from pygame.locals import *
from sys import exit

pygame.init()

# 生成窗口以及窗口标题
screen = pygame.display.set_mode((640, 480), 0, 32)
pygame.display.set_caption("Little Case")

# 加载并转换图片
highway = pygame.image.load(highway_image_name).convert()
car = pygame.image.load(car_image_name).convert_alpha()

x = 0
y = 300
z = 1

# 加载以及渲染字体
my_font = pygame.font.SysFont("arial", 16)
text_surface = my_font.render(("%d car" % (z)), True, (0, 0, 255))

# 主循环
while True:

    for event in pygame.event.get():
        if event.type == QUIT:
            pygame.display.quit()
            exit()

    # 矩形颜色坐标等
    rc = (0, 250, 0)
    rp = (560, 0)
    rs = (639, 60)

    x += 0.2
    if x > 640 + car.get_width():
        x = -car.get_width()
        z += 1
        text_surface = my_font.render(("%d cars" % z), True, (0, 0, 255))

    screen.blit(highway, (0, 0))
    screen.blit(text_surface, (620 - text_surface.get_width(), text_surface.get_height()))
    screen.blit(car, (x, y))
    pygame.draw.rect(screen, rc, Rect(rp, rs), 1)  #   Rect(左上角的坐标,右下角的坐标)

    pygame.display.update()
两张图片:
highway.jpg

car.png
pygame系列小程序:奔跑的小车
声明:以上内容来自用户投稿及互联网公开渠道收集整理发布,本网站不拥有所有权,未作人工编辑处理,也不承担相关法律责任,若内容有误或涉及侵权可进行投诉: 投诉/举报 工作人员会在5个工作日内联系你,一经查实,本站将立刻删除涉嫌侵权内容。